Background Removal with Layer Masks
 Layer Masks are an essential component of Photoshop, allowing the user to have full control over the blending and compositing of images and effects. New users often rely on the magnetic lasso or quick selection tools for background removal tasks, however with Layer Masks you can achieve much greater accuracy. This method requires a little more patience than auto-selection tools, but is well worth the extra leg-work!
Layer Masks 101
Arguably one of the most powerful functions in Photoshop, Layer Masks are used in almost every compositing task. The basic premise of Layer Masks is that Black and White controls the ‘opacity’ or transparency of a certain layer or element.
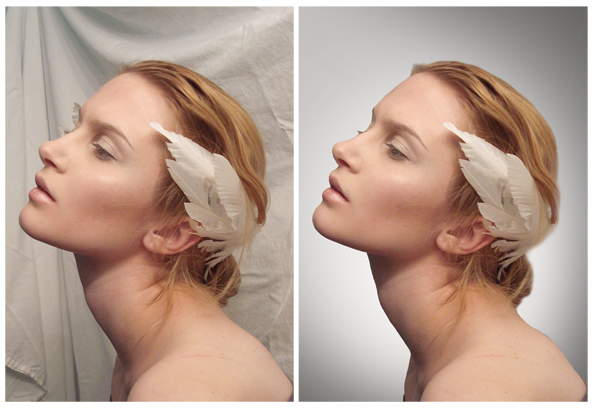
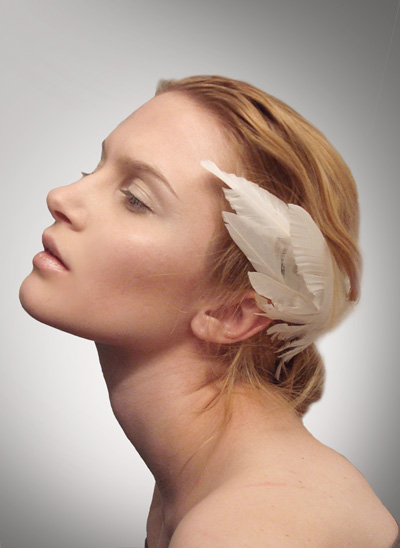
The benefit of using Layer Masks, as opposed to just erasing parts of an image with the Eraser (E), is that you can edit the ‘Mask’ at any time, or even delete it if no longer required. This non-destructive method of working affords a lot more editorial control, allowing you to change your mind and update as many times as necessary. Image Credit: Angel Stock by Reine-Haru (DeviantArt)
 Auto-Selection Tools
Magic Wand (W), Quick Selection (W), and Magnetic Lasso (L) are very smart pieces of kit – but they are no match for human awareness. These selection tools can often leave pixellated edges or ‘artefacts’, as they are based on algorithms that select pixels based on colour value. At times they can work beautifully when there is a plain background, however the results are never perfect; when you are dealing with items that have ‘busy’ backgrounds, these tools often fail miserably.
For full control of background removal tasks, there are a number of options available. Layer Masks are a great way to get started as they allow you to deal with objects of varying density; such as sharp edges and soft-edges such as animal fur or hair.
Let’s do it..
Start with a new Photoshop Document, and ensure that the object you are working with is it’s own Layer, above the background. With your object layer selected, add a new Layer Mask by clicking the Layer Mask icon at the bottom of the layers palette:
![]()
Select the Brush Tool (B) and set the edge hardness to ‘soft’, the options dialog can be quickly accessed by right clicking on the screen. With the foreground colour set to ‘Black’ – use the Brush Tool to paint away parts of your object layer, revealing the background below it.
Sharp / Hard Edges
For the example, I am using Angel Stock by Reine-Haru (DeviantArt).
With the Layer Mask selected and my foreground colour set to Black, I used a small (13px) soft-edged Brush (B) to paint away the edges of the model’s neck. If you make mistakes you can quickly switch the colour to White by hitting X on the keyboard, and paint over any errors.
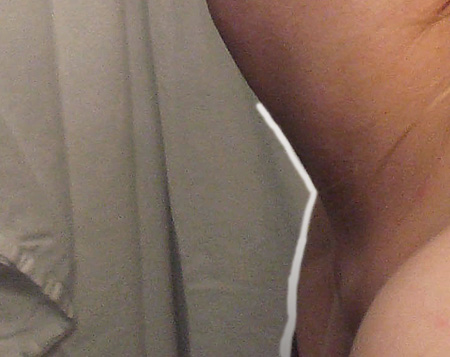
Switching to Polygonal Lasso Tool (L), I create a selection around the surrounding area and through the ‘path’ I created with the Brush – and fill that selection with Black (right-click selection, Fill Path with Black). Using the Lasso tool saves a bit of time as you can fill a large area with Black in one go, as opposed to painting away with a Brush:
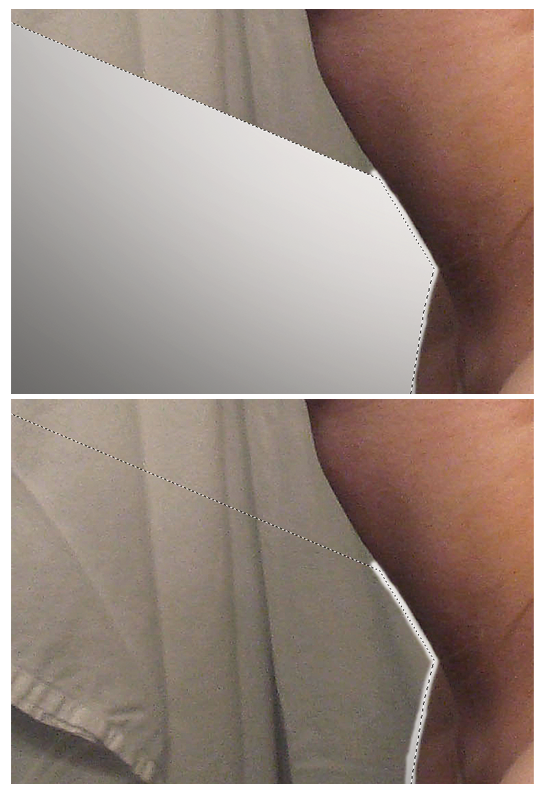
A small brush will provide a sharper edge, and when combined with the lasso tool you can remove large parts of the background in a fairly short amount of time.
Soft Edges
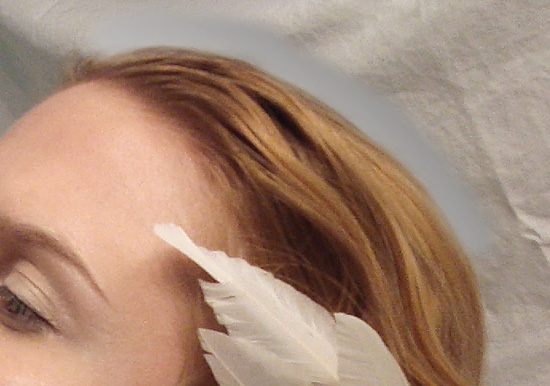
Dealing with elements such as hair and fur, where the surfaces are not as well defined – increase your brush size to achieve a more ‘feathered’ edge:
Essential Shortcuts
Using the mouse and keyboard shortcuts together really increases efficiency, as working with Layer Masks can be quite a fiddly task.. I recommend using these awesome time-savers in your workflow:
• Space Bar – Allows you to use the mouse to pan around the screen, without the need to use the scroll-bars. Absolutely essential.
• Bracket Keys [ ] – Using the bracket keys allows you to quickly increase or decrease the brush size without accessing the dialog options.
• D and X - D will set the foreground colours to default Black and White, X will cycle between them.
• Ctrl+ / Ctrl- / Ctrl0 - Ctrl (Cmd) +/- will zoom in or out, and Ctrl (Cmd) 0 will fit the document to the screen. Great for checking your progress.
Result:
With a steady hand and a bit of patience you can achieve professional results. As your Photoshop skills develop, you can refine these techniques by incorporating the (superior) Pen Tool and Refine Edge Commands to achieve truly flawless background removal.
Feel free to share your own Layer Mask techniques in the comments section below and RT to spread the word!
Conzz ![]()
Follow on Twitter >> @Conzpiracy
Further reading: >> Pen Tool Background Removal
Another great post Conzz! Keep em coming!
Cheers Mark
I always remove the background like this, but I think in the example shown above, the hair on the back of her had looks off. It’s too soft.
The example piece is to illustrate the overall concept, so it isn’t to the usual standard. For hair, I use the refine edge command which is producing flawless results
nice effect..love it..
Wow! nice masking, like the tutorial ……….
I like this method.Saves a lot of time snd you can use other tools to refine edges.Right on.
Thanks!! Very useful post on background removal!!