Black Demon Eyes in Photoshop
 Demons come in many guises, and in some cases they have black glossy eyes. Fortunately, this is a straightforward effect to replicate in Photoshop and is infinitely easier to execute than the challenging Undead Eyes effect. The trick, as ever is based on the lighting – with subtlety playing a key role. Get your dose of digital horror as the mystic season approaches, read on for the skinny!
Black ‘em In
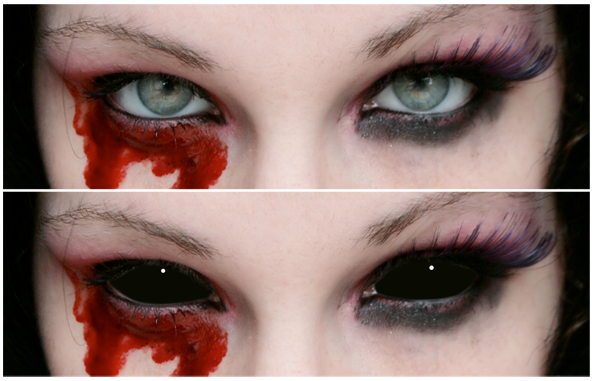
Open up your stock image in Photoshop, and create a new layer above the model image (name this ‘black layer’). Using a drawing / selection tool of your choice – fill in the white areas of the eyes using black (for the example I used the Pen Tool) on the new layer. I’d recommend you sample a dark black from the image itself using the Eyedropper Tool (I) as opposed to using extreme black, this just makes things a little more naturalistic.
The stock image used here is ‘bleeding stock’ by GlamorousAcid_Stock (DeviantArt).

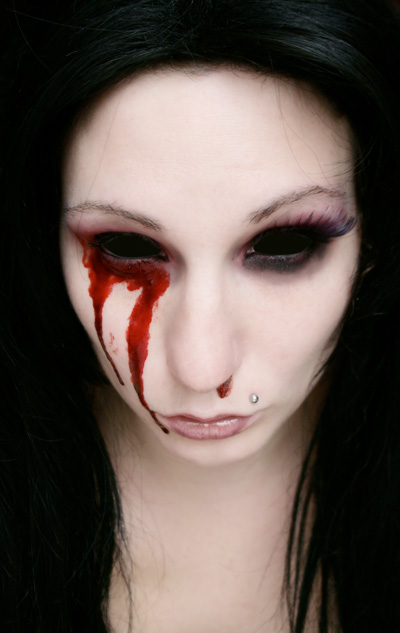
As you can see the eyes seem pretty flat and empty. Wet / glossy surfaces are great reflectors, so we have to create some highlights to bring those dead eyes to life. Check our Lighting Tutorials for more info.
Simple Highlights
This step brings out the spherical nature of the eyes. Temporarily hide the layer that contains the black by clicking the Show / Hide eye icon on the layer. Look at the source image and observe where the existing highlights are on the original eyes, this is where you will want to place your new highlights. Create a new layer above the black layer; on the new layer use a hard-edged Brush (B) set to white to place new highlights – this should require just a single click for each highlight.

One For Luck
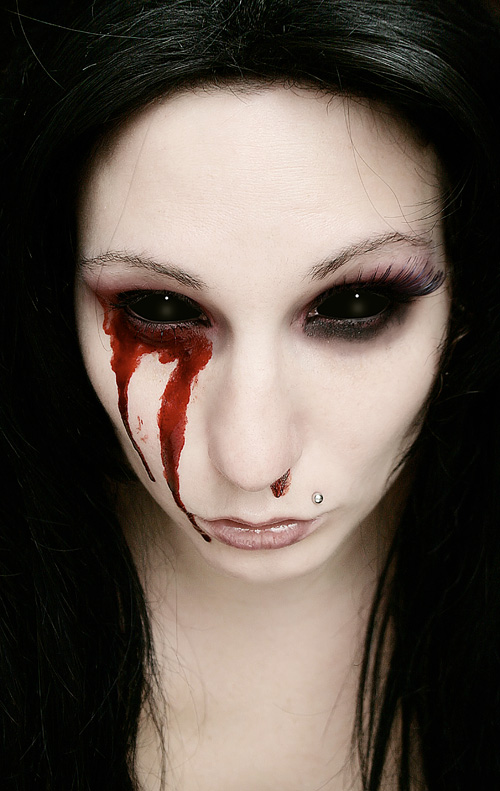
The above effect looks great in it’s own right, but for the example I wanted to give the eyes a finish touch just to make them a little more tactile. I created a new layer above the ‘highlights layer’ – using a soft edged brush, I created two softer highlights below the originals and applied a Gaussian Blur (Filter > Blur > Gaussian Blur) to soften it up a bit. In your own version, you may want to tweak the Layer Opacity of the secondary highlights to find the right balance.

The Result
A couple of minor tweaks were added to the example to accentuate the sockets and brighten the skin – but overall no more than 5 minutes of work:

I hope you enjoyed! Please feel free to share your own techniques in the comments section below.
Conzz ![]()
Follow on Twitter >> @Conzpiracy
Nice quick one Conzz love it.
Nice one Mark, cheers!
When I’m doing demo eyes, I always take the original photo, mask away everything I don’t need only leaving the original iris. Then I darkend it as much as possible, so the original light reflections are left. That reflection is added via “lighten” or “screen”. Makes it look more realistic.
An example can be seen here: http://www.flickr.com/photos/royal-nightmare/3626700314/in/set-72157619481037239/lightbox/
Thanks for the link and tips! Nice effect you have there, very ‘cenobite’ flavoured
I’m extremely new to adobe photoshop… and i honestly can’t figure out this technique.
can anyone help me out here?
I’d really like to tweak this photo or if possible i could email the photo?
It is made from the rind of the tamarind fruit,
which is type of like a little pumpkin. They can be utilized raw,
or after roasting and frying. I am a lot more energetic since I intend to be.