Epic Movie Photoshop Type Tutorial
 I love figuring out how things are done in Photoshop.. My latest experiment is an attempt to recreate some of the awesome text created by some of the leading flyer designers on Deviantart. This type effect packs a lot of punch, much like an ‘Epic Movie’ title – and the great part is, it’s relatively straightforward to achieve. Want high drama type that brings a sense of occasion? Read on to see how it’s done..
Coming Soon to Theatres Near You..
To provide a little more cinematic ‘pizazz’ I put together a simple background using textures from Lost&Taken, and the Instant Backgrounds in Photoshop technique.
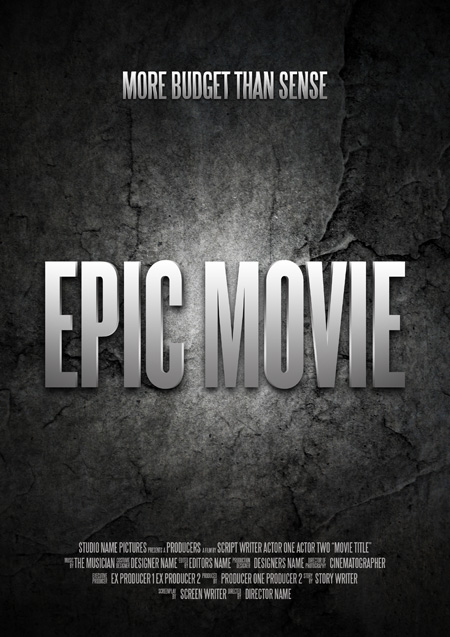
When working with titles, it’s often better to have the background area uncluttered or less complex than the rest of the composition. This increases legibility and gets your message across with more efficiency.
Type & Gradient
To begin, set white as your foreground colour (Hit D, and then X) – use the Type Tool (T) to create your text. The title in the example uses Knockout (HTF66-FullFlyweight), this is an awesome typeface that works well in many scenarios, but particularly good for movie titles!
Right-click on your type layer, and select Blending Options. Select the Gradient Overlay dialog and click the gradient image (see below) – a new set of options will come up allowing you to edit the gradient. Use the settings illustrated below, the important thing here is to have a midtone grey that blends to white. You can edit the gradient colours by clicking the colour swatches (highlighted with red circle). Hit ok to apply your changes.
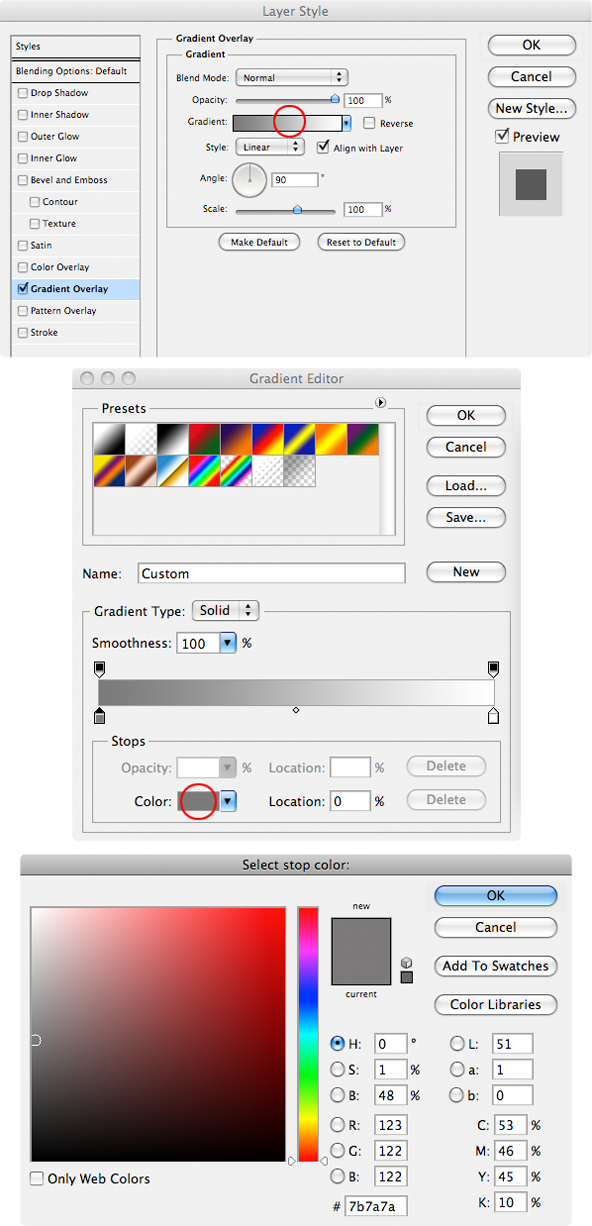
Here’s a look at our type with the gradient effect applied. Ive used a temporary dark grey background to illustrate better:

Duplicate
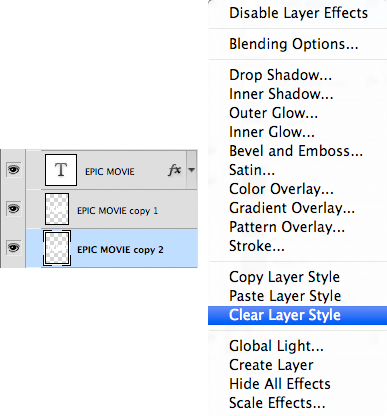
With your type layer active, duplicate it twice (Ctrl/Cmd+J), so you have the original and two copies of the layer. Move these layers below the original in the layer stack. Clear the ‘layer style’ from the copies (with layer active, right-click on ‘fx’, select ‘Clear Layer Style’), and then ‘rasterize’ them (right-click layer, select ‘Rasterize Type’). This will allow us to edit the type as pixels for the next step.
Nudge n’ Merge
This is the only step in the walkthrough that can be a little tricky, but once you have it figured – will be no problem at all! Click on one of your type layer copies. Select the Move Tool (V), and nudge the layer to the right a couple of times (using the arrow keys on your keyboard). The nudge distance will vary, depending on how close you are zoomed in.

Use the Rectangular Marquee Tool (M) to create a selection around the white behind the ‘Movie’ – and hit delete, leaving something like this:

Hide this layer copy and make the other layer visible. Repeat the steps above, but this time nudge to the left (use the same number of nudges you used for the other layer to keep things even). Again, you will need to create a selection around the left portion of the type and hit delete. This is how it looks:

Make both copy layers visible, and merge them together (Ctrl/Cmd+E). Name this layer faux-3D. You should have something that looks like this:

You’ll notice that the ‘M’ doesn’t have any white behind it, this is a faux 3D effect, and is the character directly in front of our field of view. In your own work, select a character that is center and ensure there isn’t any background ‘white’ behind it.
Gradient Again..
Ensure these two copies were merged together, so they’re now one layer. Right-click on this layer, select Blending Options and go to the Gradient Overlay dialog. Select the copper looking gradient, leave it’s default settings and hit ok.
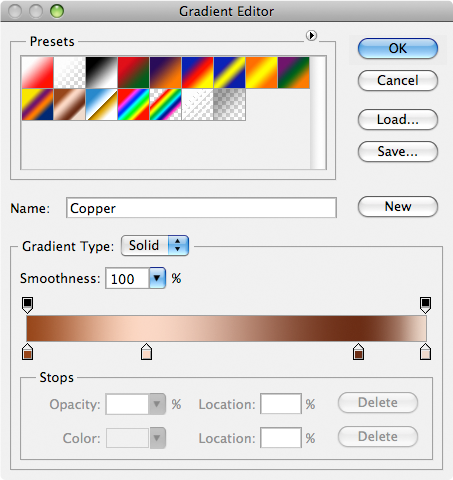
This gradient gives us the effect we want ‘right out the bag’ so to speak, but there’s one other step to mute the brown tones.

Create a new layer above your faux-3D layer. Create a selection based on the faux-3D layer (Ctrl/Cmd + click faux-3D layer icon), with the new layer active, fill with white. Set the layer mode of this new layer to ‘colour’, this will knockout the brown tones beneath. This can also be achieved by using Adjustment Layers, but for the purpose of simplicity, this is how we’re doing it today!

Our layer stack so far:
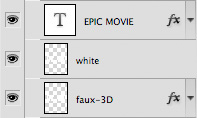
Shadow
For this step we will be manually creating a drop-shadow. I often take this route, as you’re afforded a lot more control of how your shadow behaves. Add a new layer to the bottom of the layer stack. Create a selection based on the Type Layer and the faux-3D layer. To do this, hold Ctrl/Cmd and click the Type Layer icon (this will create a selection), hold down Ctrl/Cmd + Shift, and then click the faux-3D layer – this will create an additional selection based on these layer contents as well. With the new layer active at the bottom of the stack, fill this selection with black.
Apply a Gaussian Blur to this shadow layer (Filter > Blur > Gaussian Blur) – and select a value that works for you. Once you have applied the blur, you may want to nudge the shadow down a little bit using the Move Tool (V) and the arrow keys – in keeping with the light direction.

Now we’re poppin’!!
Extras
I repeated the above steps to create the strapline for the poster. I found a great font (Steeltongs) that has production role credits built into the lowercase letters – amazing! You can grab this typeface HERE. Et voila!

Review
We’re starting to get a nice little collection of ‘movie-themed’ walkthroughs here at SurrealPSD – I hope you enjoy these cinematic flavoured projects as much as I do!
Conzz ![]()
Follow on Twitter >> @Conzpiracy
More Type Tutorials:
• Photoshop Chrome Type Tutorial (Level: Intermediate) >> Use simple lighting effects to produce a sleek chrome-like effect for type in Photoshop.
• Ghost Text Photoshop Tutorial (Level: Beginner) >> Add an air of mystery and ethereal menace to your type with these straightforward steps.
• Destroy Text in Photoshop (Intermediate) >> Transform any typeface with this great looking grunge effect in Photoshop, much like the awesome Band of Brothers and 28 Days Later logos.
[...] Epic Movie Photoshop Type Tutorial [...]
[...] Epic Movie Photoshop Type Tutorial [...]
[...] The most relevant tutorial I found was on Dean’s website SurrealPSD.com, which is titled Epic Movie Photoshop Type Tutorial. Exercising this technique is my next step, as well as creating a base layout for the [...]