Halloween Photoshop: Slenderman Walkthrough
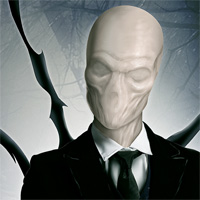 It’s a great thing that myths and fairytales can prevail in this digital age. For the final installment of our ’4 Weeks of Terror’ tutorial series, we will be visiting the elusive Slenderman – a more recent spectre in the global gallery of horrors. We’ll be mixing up classic photomanipulation work alongside some digital painting techniques; so step into the woods and come meet the Slenderman….
The Stocks
Slenderman is a tall, spindly figure that wears a black suit with no distinguishable features. He wears a tie that is depicted as either red or black. When seeking the primary stock image, a figure wearing a suit that fits the concept was paramount. I found a great image in AimeeStock’s (DeviantArt) gallery that was suitable – even though it’s female.
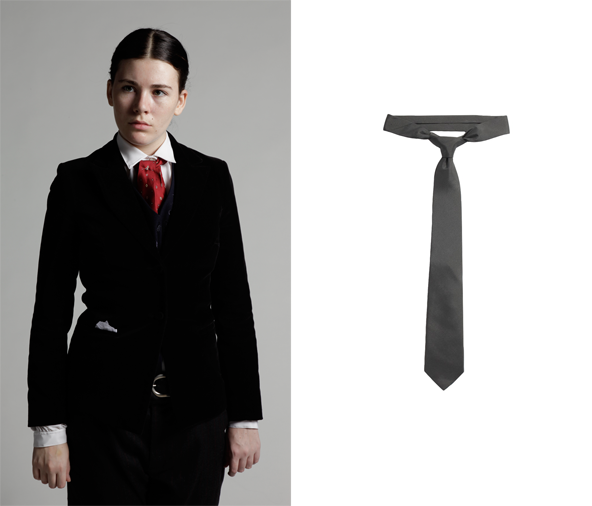
I grabbed a black tie to replace the fanciful one in the primary stock image – this will help in producing the formal look.
Prepping the Stock
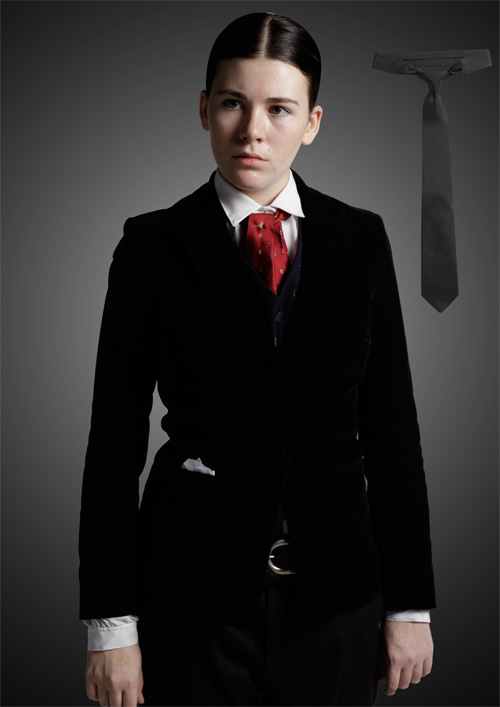
The ‘background removal’ is one of the most common tasks undertaken in composite work, and is usually how things are started. I performed a background removal on the primary stock image and the tie using the Pen Tool Background Removal technique, as it delivers the cleanest cut. A simple background was put together using a Radial Gradient (G), to make the workspace a bit more pleasant than stark white:
Body Modification
We will be re-painting the head, so a little tweaking is required to elongate the original features of the stock model. Slenderman’s neck is definitely longer – so to resculpt these features, the following steps were undertaken:
1. Ears are removed from stock model using the Pen Tool.
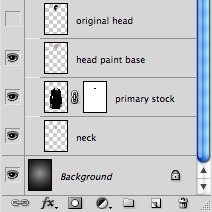
2. A selection is created around just the head – the head is copied onto a layer above. Using a Layer Mask, the neck and head are removed from the original stock image. (Layer 1 = body with no neck / head, Layer 2 = only the head)
3. The ‘floating’ head on layer 2 is filled with a midtone colour sampled from the face using the Eyedropper Tool (I). You can hold Ctrl/Cmd + click the layer icon to make a selection based on that layer, then fill with your selected colour on a new layer. The new head is ‘nudged’ upward using the Move Tool (V) and the Arrow Keys, and then rotated a little using the Transform Tool to add some character (Ctrl/Cmd + T).
4. On a new layer below the primary stock image, a shape is created with the Pen Tool to create the neck, and then filled with the same colour used for the face.
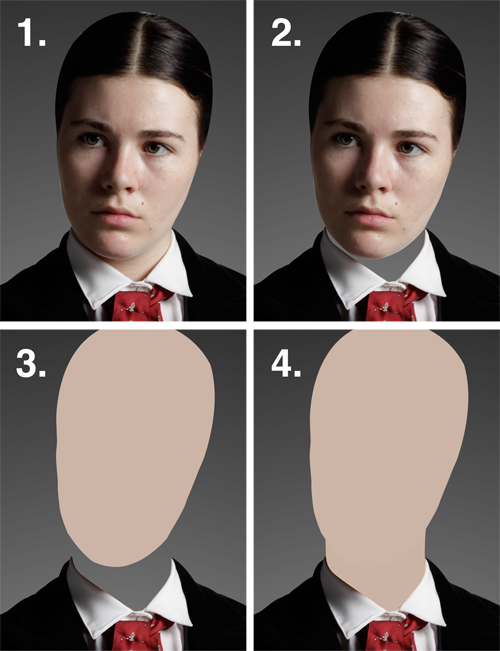
Here’s a look at the layer stack:
A New Tie
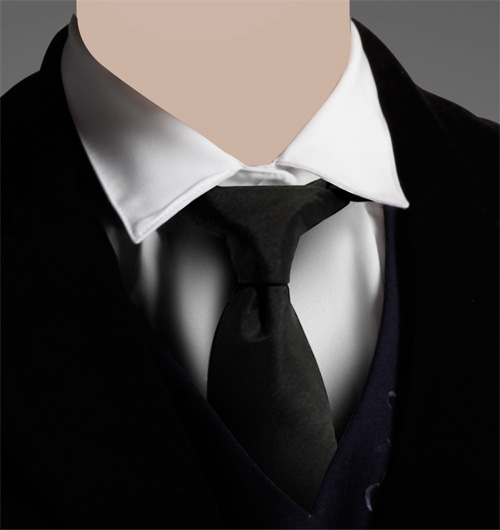
Layer Groups always come in handy when working with multiple layers, so I created a new Group (Ctrl/Cmd + G) and named it ‘Clothes Painting’. All of the following layers and steps were done within this group.
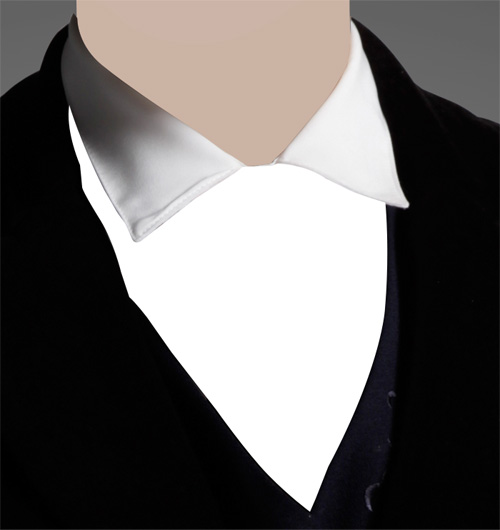
On a new layer (Shift, Ctrl/Cmd + N) I drew a path using the Pen Tool (P) around the shirt area I wanted to work in, and filled with white (right-click path > ‘Fill Path’ > Select White from dialog). This layer was named ‘Shirt Mask’ and hidden by clicking the eye icon on the Layers Palette. The mask when visible:
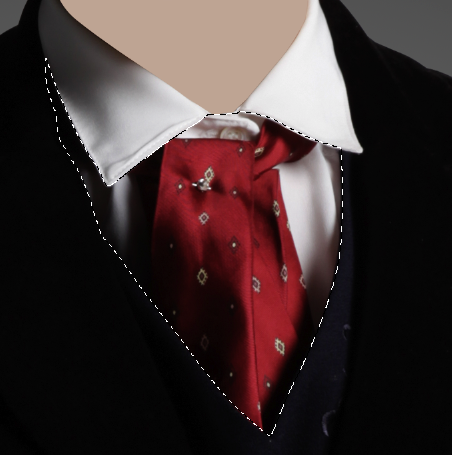
When painting over the original tie, I can create a selection based on the Shirt Mask by Ctrl/Cmd + clicking the layer icon – which will keep all of our work within the required area:
On a new layer, some basic tones sampled from the existing shirt were used to roughly paint over the original tie. A very small amount of Noise (Filter > Noise > Add Noise > 1px) was added directly to the layer for a bit of texture.
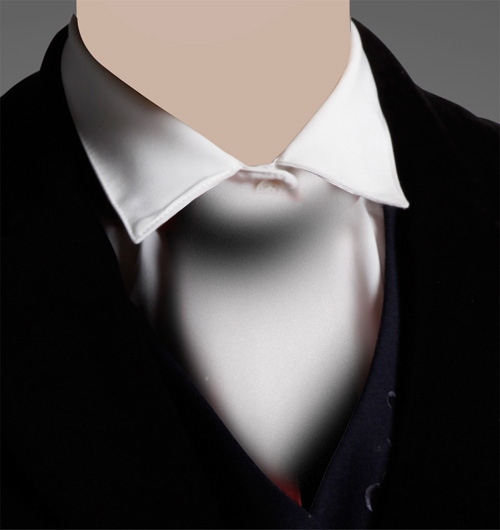
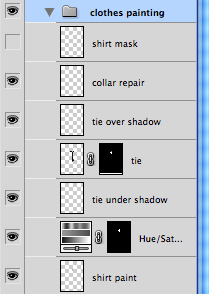
A new Hue/Saturation Adjustment Layer was used to remove some of the reds that were creeping through. The tie previously cut out is bought into place and rotated to fit using the Transform Tool (Ctrl/Cmd + T). New layers are added above and below the tie so shadows could be painted in using a Soft Edged Brush, and a colour just off-black. A little bit of repair was done on the collar, by sampling existing tones and painting on a new layer:
The layer stack inside the clothes group:
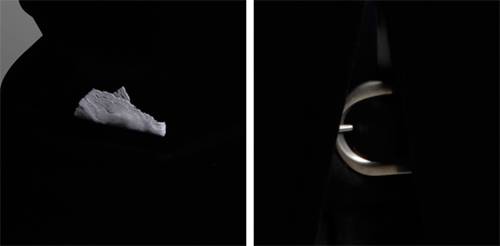
Removing Details
Slenderman prefers a more minimal aesthetic, so remove any additional details or flourishes from your stock image. For the example, a selection was drawn around the napkin and buckle with the Lasso Tool (L). The selection was right-clicked and filled with ‘Content-Aware’ (right-click > Fill > Use: Content-Aware).
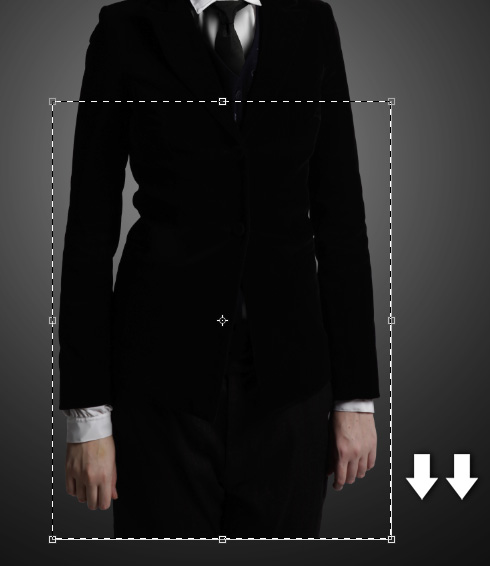
Elongating the Torso
Normally, I’d never distort pixels by ‘stretching’ them vertically, but in this instance it was the right tool for the job. A square selection (Marquwas drawn around the torso area I wanted to stretch, then the Transform Tool (Ctrl/Cmd + T) was used to elongate the region. As Slenderman has inhuman proportions – we can get away with it just this once ![]()
The Hands
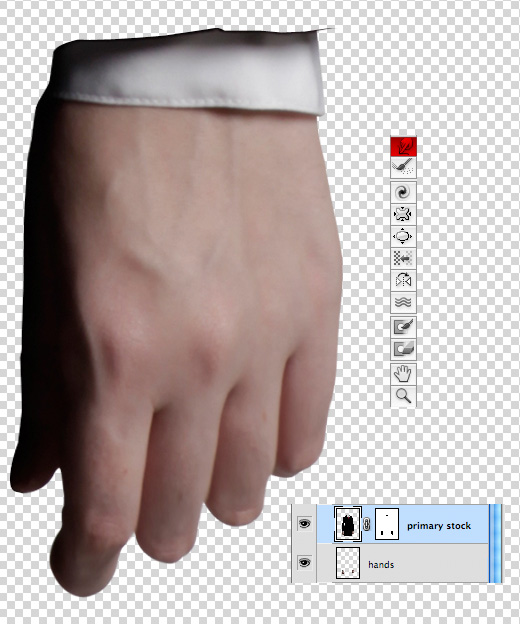
A selection was created around just the hands and white sleeves using the Pen Tool (P), and they were copied and pasted onto a new layer below. On the primary stock image the hands were removed using the Layer Mask. This allows us to edit the hands freely, without distorting the rest of the body. Transform Tool was used to scale them vertically (Ctrl/Cmd + T) and then the Liquify Tool (Filter > Liquify) for elongating and accentuating the fingers and knuckles using Forward Warp (W), shown below:
Removing the Hips
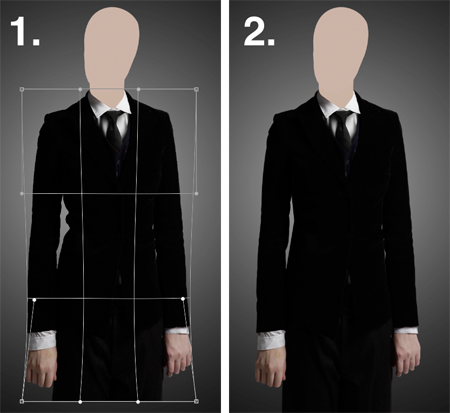
At present the primary stock image has a concave, female form – which we’ll have to contort into a more narrow shape. The primary stock was merged with the hands, so they become one layer (Ctrl/Cmd + E) and then the Warp Tool (Edit > Transform > Warp) was used for contorting (Image 1).
Further work was required to remove the kinks from the hip of the jacket, so a new layer was created below the primary stock image. The Pen Tool (P) was used to draw a rough shape (sampling a colour from the jacket using Eyedropper Tool), to re-form the shape of the hip area (Image 2).
Painting the Head
Here comes the fun part.. A Wacom tablet is used to manually paint in the head and features, using a standard brush with opacity and pressure settings turned on (see below):
![]()
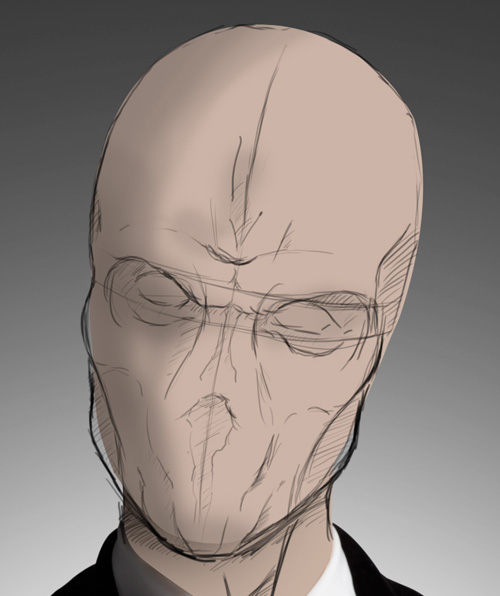
The general shape / form is sketched out on a new layer using black and a 8px brush (B), on a new layer above the ‘head base layer’, some simple shading is put in with the same brush on a new layer but at a wider setting (around 40px):
The ‘head base layer’ is used for filling in the gaps created by the sketch, sampling the beige tone with the Eyedropper Tool (I) and a filled path using the Pen Tool (P):
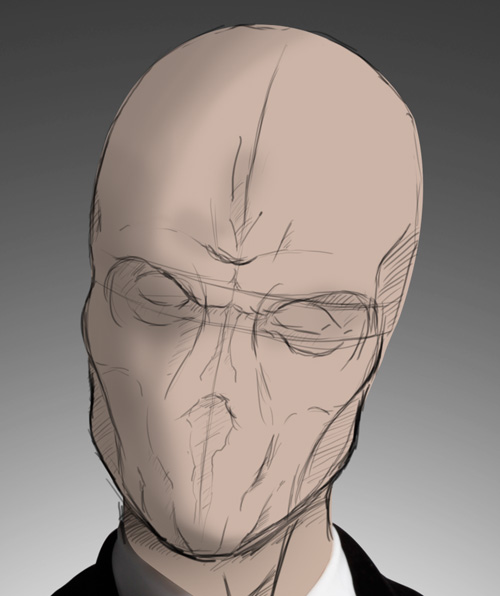
The ‘sketch’ layer was brought down to around 17% opacity and then a new layer set to Mulitply was created to start blocking in the dark regions / shadows. Brush opacity is set to a dark brown and taken down to 20%, so the tones could be built up gradually. This process may require additional layers for extra control:
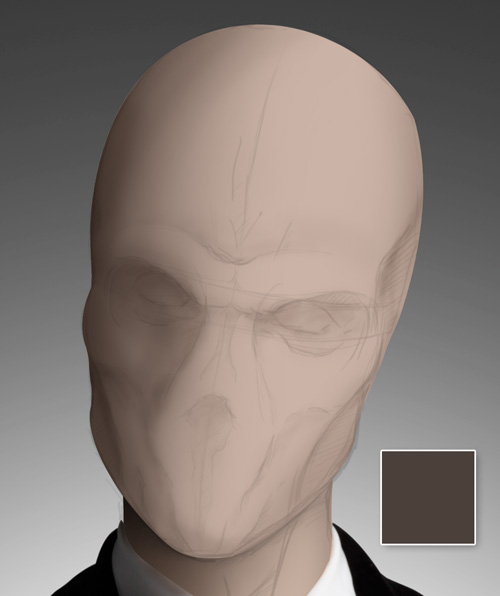
More build up of shadows, but this time removing small highlights using Eraser (E) or Layer Masks. Sketch outline layer hidden:
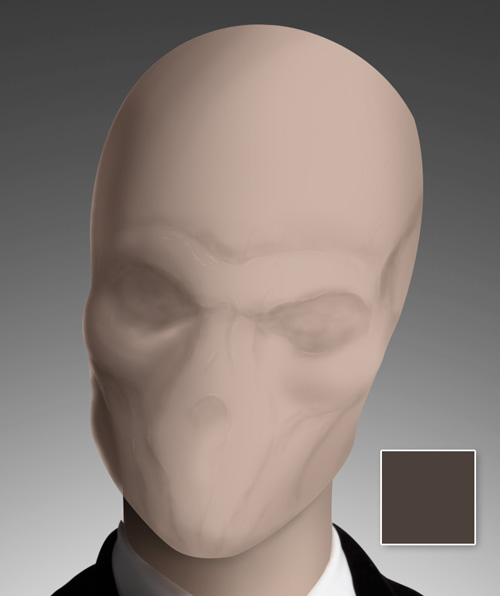
New layer, set to Overlay 100%. Varying sized brush widths used at low opacity (around 22%) are used to paint in the highlights from the right light source:
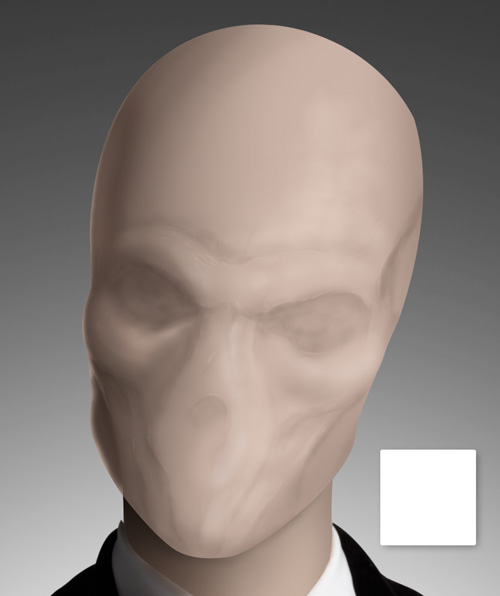
Another layer set to Overlay, enhacing the highlights. Additional work also undertaken on the shadows layer. All brushes using 20% opacity and varying widths. The neck has been painted in a similar fashion:
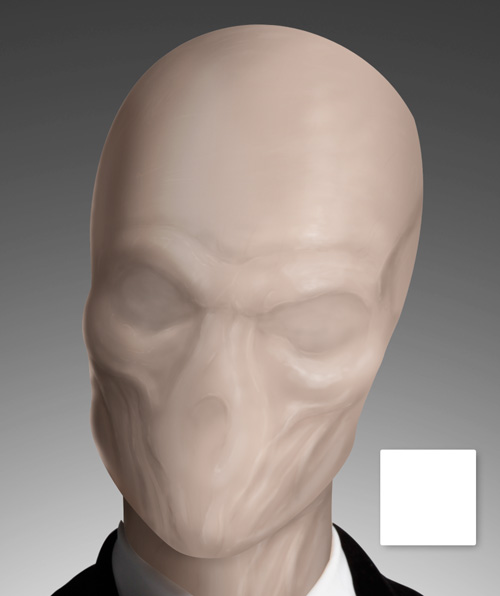
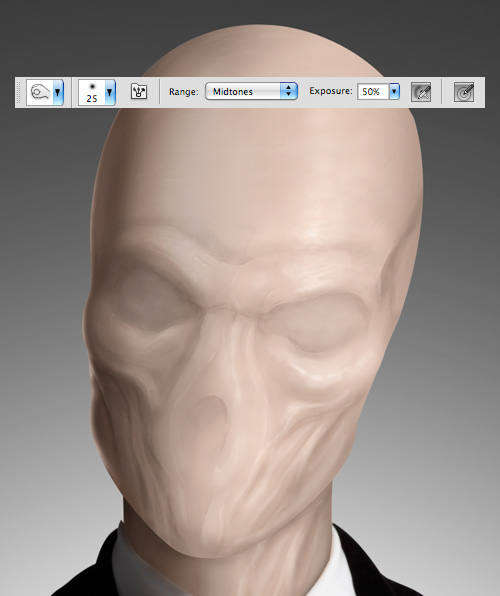
To add detail, a Dodge/Burn Adjustment Layer was created (New Layer > Edit > Fill > 50% Grey > Set layer to Soft Light). Using the Burn Tool (O) (Midtones, 20% – 50% opacity, 4px – 20px) more definition was added to the contours. A little Dodge tool (O) was used also to bump the highlights a little. Working on the 50% Grey layer means we can work non-destructively and easily step back on any mistakes.
A new Adjustment Layer (Levels) was added to boost the tones a little on the head and neck.
Tendrils
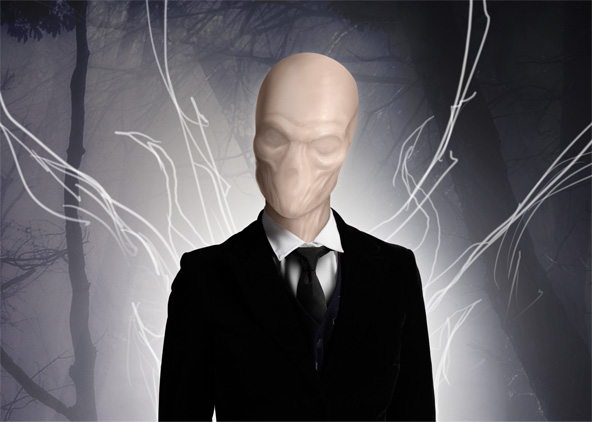
At this stage, a background was bought in to to get a feel for the overall scene (Woods image by wyldraven, DeviantArt). A new layer was created underneath the Slenderman body group, and some tendrils loosely sketched in:
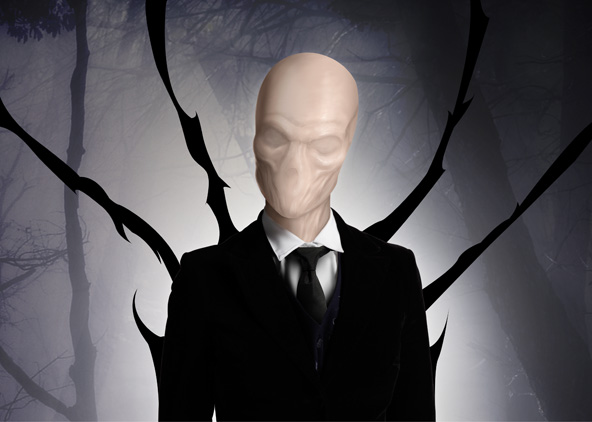
On a new layer, using the Pen Tool – the tendrils were traced with paths and then filled with black:
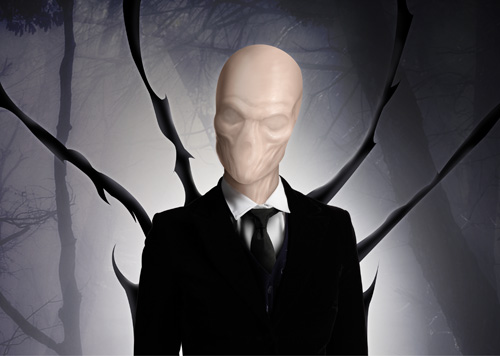
A selection was created using the neat tendrils layer (Ctrl/Cmd + click Layer icon). On a new layer above, some basic highlights were painted in using a Soft-Edged Brush (B). The first set of tendrils were duplicated (Ctrl/Cmd + J) and added to the lower section of the torso.
The Finished Article
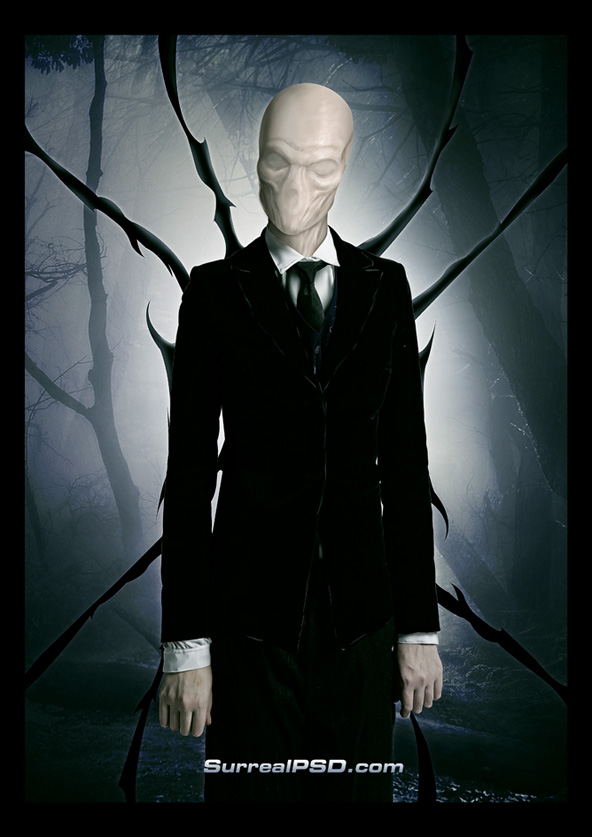
This is one of those pieces that requires a lot of patience as there is a lot of drawing and composite modifications.. Alas, if you stick these things out you can get great results:
Review
That will do it for our Horror tutorials (for now). Next on the agenda, 4 new Sci Fi tutorials! If you would like to see anything specific, please drop us a message below.
Conzz ![]()
Follow on Twitter >> @Conzpiracy
• Halloween Photoshop: Skull Face Tutorial (Level: Advanced) >> Create a ghoulish Skull Face effect with this Halloween flavoured Photoshop Walkthrough.
• Halloween Photoshop: Evil Eyes Tutorial (Level: Intermediate) >> Use Photomanipulation techniques to create creepy evil eyes in this Photoshop walkthrough.
• Halloween Photoshop: Stitches Tutorial (Level: Advanced)>> Create torn skin and grisly stitches with this Photoshop Horror Walkthrough.
your awesome!!!!!!
[...] Tutoriel entre photomanipulation et digital painting pour peindre « Slenderman &raqu… [...]