Photoshop Android: Machine Works
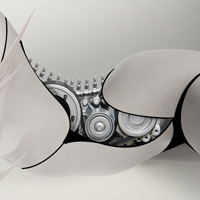 Although designed to look and act like humans, many Androids have mechanical elements that reveal their artificial nature. Using Photoshop there are a myriad of techniques that can be used to create the illusion of working robotics, in this edition however we will be focusing on the integration of stock elements to achieve the desired results. If you are not familiar with the Pen Tool, you may want to check out our Pen Tool Tutorial before you crack on with this walkthrough
 ![]()
Organic Lines
Creating the illusion of a mechanical being can be downright tricky at times. Everybody is familiar with the human form; what looks natural and what seems ‘out of place’. In the creation of your Photoshop Android it’s definitely helpful to refer to some anatomical diagrams, particularly the muscle and bone systems. This will aide you in creating a more visually pleasing, ‘organic’ creation.
Before I sought out stock images to splice into the example android, I spent a fair amount of time sketching out lines which indicate where the mechanical elements will be. Although simple in execution, this process took a long time. The lines on the example were created using the Pen Tool (P). The larger black areas were achieved by creating a closed path, right clicking and selecting ‘Fill Path’; the lines were done by creating paths, right clicking and selecting ‘Stroke Path’.

The Pen Tool was definitely essential in creating these pleasing lines; if you have an excellent free-hand with the Wacom tablet, Im sure that’s another method that could be used.
Body Chop
The direction you take with your photo manipulation may often be dictated by the source image that you use. In the example image my model has a curved posture, so I decided to capitalise on that and integrate the mechanical elements within the arch of her back. The guide lines drawn earlier help with determining where the ‘chop’ will be, the selection I want to remove is shaded in red below:
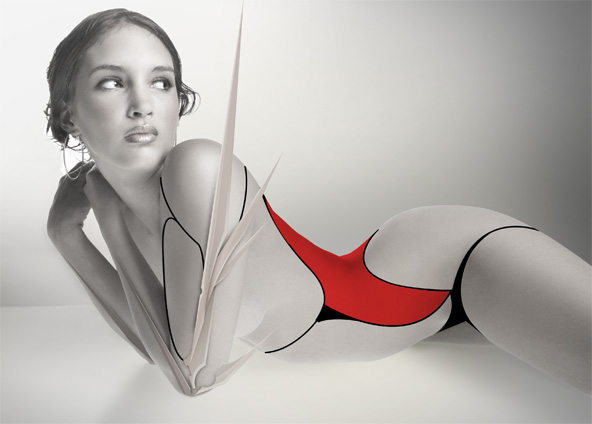
I have the model on a seperate layer above a new background that I created using the original stock image as reference. When I remove parts of the model, the new background will show through (as opposed to taking chunks out of the image).
To cut the section from the model layer, a layer mask was applied (click layer mask icon, bottom of layers palette) and a path was created around the area I wanted ‘chopped’ using the Pen Tool (P), which was then filled with black (right click path, select Fill with black).

Sci Fi Stock
Stock Hunting is an artform in itself and finding the ideal stock element can often be fairly time consuming. What makes good stock for sci fi and biomech art? Well, it depends on the style that you would like to achieve; here are some keywords that can help you on your way:
engine, machine, apparatus, surgical, industrial, steam, steam train, mechanical, piston, cogs, panel, tubes, wiring, metal, chrome, robotics, gears, pulleys, levers, circuits, wiring, pharmaceutical, manufacture, production, mechanized
You’d be surprised at some of the unlikely things that can be used for robotic photo manipulation, in the past I have used scuba gear, garden tools, tattoo instruments, medical appliances and all kinds of stuff. Be creative, look for the alien in the ordinary. Funnily enough, the stock image Ive used for the example is actually quite generic, but good old’ engine parts definitely do the job. Especially if they’re shiny ![]()
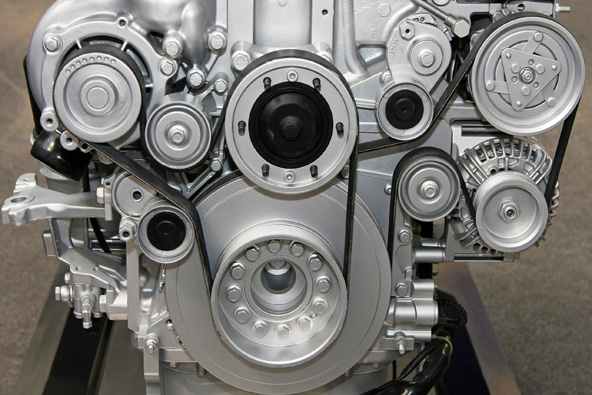
I got this lovely beast from StockXpert a few years back; it was a great site before it’s unfortunate closure. I now get all my high-quality stuff from Fotolia, which has a great selection but I feel they could be priced a bit more competitively.
Cut and Compose
I pulled the engine stock image into the document, under the model in the layer stack. I used the transform tools (Edit > Transform) to scale and rotate the engine to see where it would look good. These types of tweaks are dependent on the artist and there is no real instruction that can be given in terms of a ‘right way’ of doing this.
Heres a look at the stock image positioned underneath the model layer:
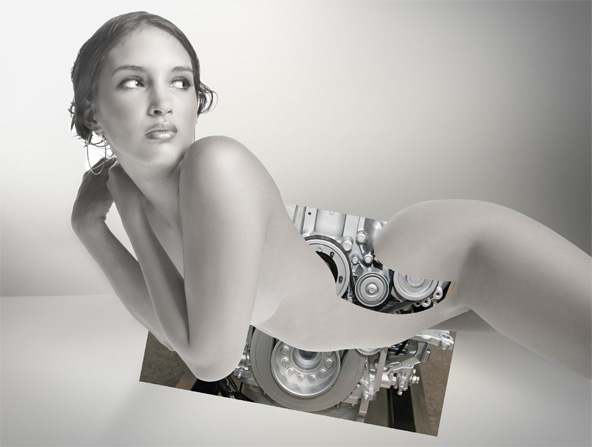
Once happy with the positioning, I went ahead and removed the parts of the engine I didn’t want – using the Pen Tool (P) to create a selection:

Creating shadows was very straightforward. I created a new layer above the engine stock set to Multiply and painted in the shadows using a soft brush with darkish a grey colour. To ensure the shadows are only applied to the mechanical parts, you can paint inside a selection (Ctrl / Cmd + click layer) or create a clipping mask (Alt + click between layers).
The Glorious Puppet Warp
Ive only just recently upgraded to Photoshop CS5 and was really pleased to find that this version is choc full of REALLY useful features. One of my favourites from this new batch of tools is the Puppet Warp function, which enables you to bend stock images to your will, so to speak. I used the Puppet Warp feature to create the spine for my android, heres how I done it:
To create a ‘spine’, start with one element that you would like repeated; in my case a small sprocket thing:
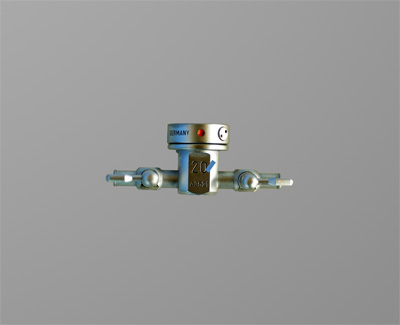
Keep duplicating the layer (right click layer, select ‘duplicate’) until you have a row:
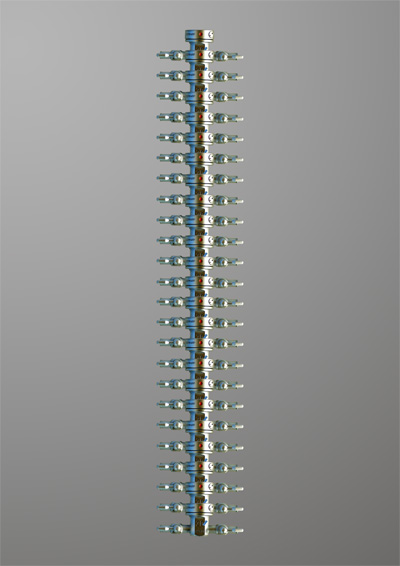
Merge the seperate layers together so the ‘spine’ is it’s own single layer, in my example I cut one edge off the side to make it more spine-like. Heres where the Puppet Warp tool comes in; with your spine layer active, select the Puppet Warp Tool (Edit > Puppet Warp). Using the pin tool that appears, assign some ‘points’ to the spine, these act as hinges – you can then control the hinges using your mouse and contort the layer to your liking:
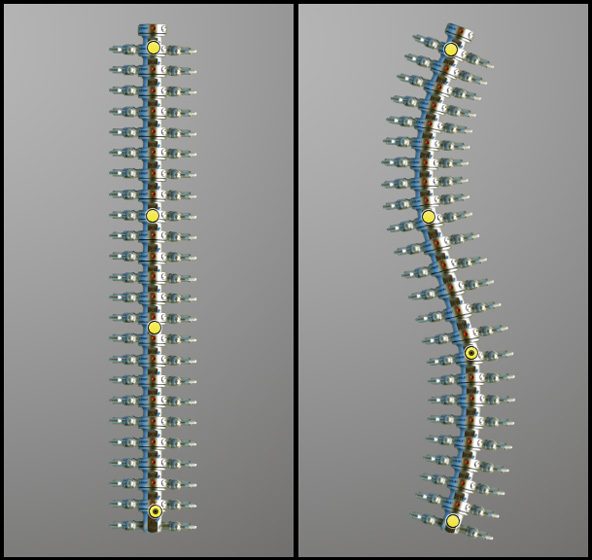
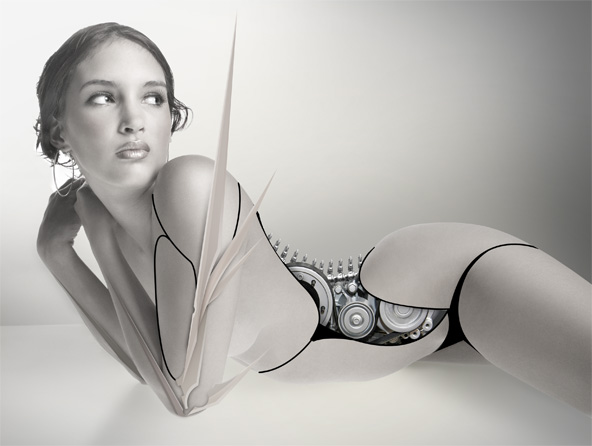
This is an extremely powerful function, and Im sure this is just the tip of the iceberg in terms of it’s full capabilities. If you have CS5, have a play – theres tonnes of uses for a tool like this. Heres my curvy spine added to the photo manipulation, with the spike and guide layers unhidden:
Coming Next..
In Part 3 of Photoshop Android we’ll start fleshing out those guidelines and adding ‘bodywork’ using digital painting and lighting techniques. It would be great if you shared this article if you found it useful, please feel free to post your own observations and techniques in the comments section below.
Conzz ![]()
Follow on Twitter >> @Conzpiracy
• Photoshop Android Part 1: Mech Spines
• Photoshop Android Part 2: Machine Works
• Photoshop Android Part 3: Panel Work
• Photoshop Android Part 4: Highlights and Wires
• Photoshop Android Part 5: Mech-A-Face
Once again brilliant work Conzz, Cant wait for the last part So what does adding ‘bodywork’ mean then?
Adding panels and lighting effects.. There may be 3 or more parts left to this series, so watch this space
Cant wait for the next part, are you going to talk about how you add wires and things like that ?
Most definitely, theres a few techniques Ive picked up using the puppet warp tool – so I’ll include all them
nicely done, but the face doesnt match the body, it seams to flat. needs more shadow on the pieces of the body. the color of the model and background are to close making it harder to see it and makes the black lines look more like a line rather than individual pieces.
The face is going, it’s all part of the plan. This is an early stage of a larger work, wait till you see the final result
Love how you did the spine! would have never thought of the puppet warp at all!
Don’t worry, I’ll be finding plenty more uses for a game changer like that
Simple and well explained tutorial on robotics, mate. I really like how your website keeps growing with not only tuts but all things about Ps and manips. Keep it up, I am a fan already
Cheers Lex, glad your enjoying the site and supporting it
[...] Photoshop Android: Machine Works You +1′d this publicly. Undo [...]
Awesome tutorial. Helped me alot where i didnt know what to do. I guess i learned some new things today. Thanks.
Excellent, glad you enjoyed
Site :…
Nice post thank’s !…
Really cool technique for the spine!