
Skin Tone Correction in Photoshop
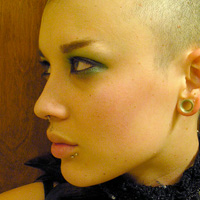 You’ve taken the perfect image. The model looks great and is framed well, but there’s one stickler, throwing a spanner in the works – the skin-tone is out of wack! This is an issue that crops up from time to time, usually due to strong bulb light in interiors, incorrect white balance and in some instances a person who has very red skin due to exertion (Im talking sports here, get your mind out of the gutter!)
Correcting Skin Tone
Fortunately there’s a nifty little technique that can resolve this issue in a non-destructive manner. Using a Curves Adjustment Layer, you can manipulate the tones naturally using the individual R, G, B channels. Sounds incredibly complex, but actually very straightforward. Let’s see it in action.
The Stock
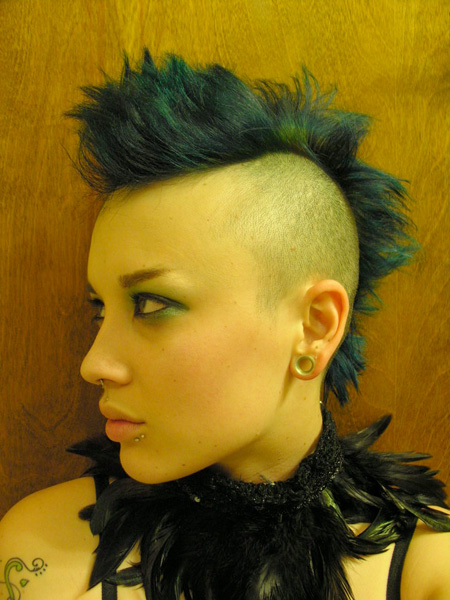
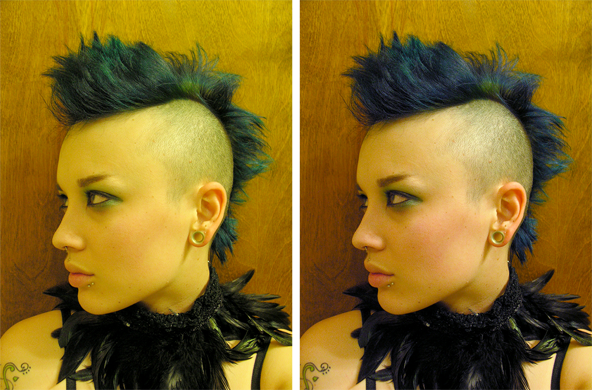
Today Im using an image by clickypenpixieXstock (DeviantArt) – a very striking pose that could work great in a cyberpunk piece, but the colour is a little off:
Curves Adjustment
The first step is to create a Curves Adjustment Layer, which you can access via the black and white circle at the bottom of the layers palette. Once launched you will see the following dialog:
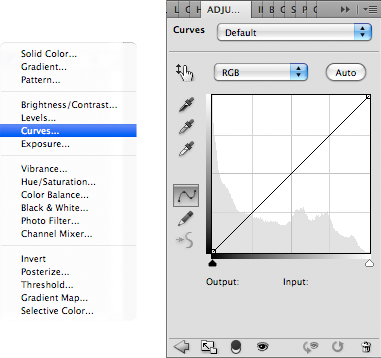
On the RGB dropdown, you are given the option of manipulating the colour channels seperately, this is how we’ll effect our changes. To move the diagonal line, simply click a ‘point’ and move as desired. Every image will require different settings – a yellow tint would require a different approach to a person with a flushed face. The good thing is you can work by eye and move the line until the image seems ‘right’.
The example image in this instance has a yellow tint, here are screenshots of the seperate colour channels used to amend the issue:
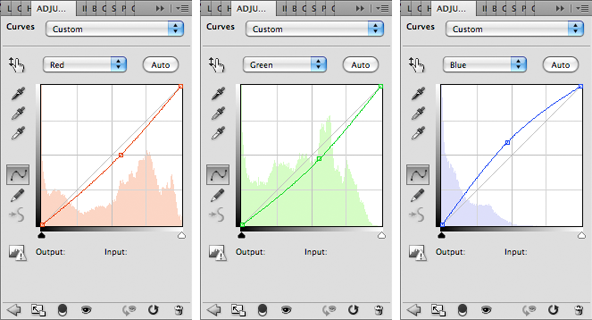
And that my friends is pretty much it! As you can see, most of the action occurs on the Blue channel; the Red and Green requiring the minimum of tweaking in this case. From this one amendment, you can see how far a little Curves action goes:
Review
You can take this technique a lot further by selectively applying the effect using the built-in Layer Mask that comes with all Adjustment Layers. This approach allows you to tweak at will, without destroying pixels or degrading the image – keeping things sleek and sharp. Non-destructive editing, one of Photoshop’s most powerful features!!
Conzz ![]()
Follow on Twitter >> @Conzpiracy
Further Reading:
• Core Skills: Photoshop Adjustment Layers
• Basic Photoshop Retouch Tutorial (Level: Intermediate)
• Photoshop Makeup Tutorial (Level: Advanced)
So simple yet so effective, good one Conzz!
Much appreciated mate