Photoshop Android: Highlights and Wires
 We’re on the home-stretch.. The Photoshop Android is nearing completion, with the final stages focusing on the finishing touches. Highlights come into play once again, creating the illusion of semi-gloss surfaces, we’ll also be bringing in some wires to beef up the mechanical aesthetic. The Pen Tool is a key player in the process, as well as the good ol’ Soft-Edged Brush for the lighting work. Read on for the skinny!
What’s New..
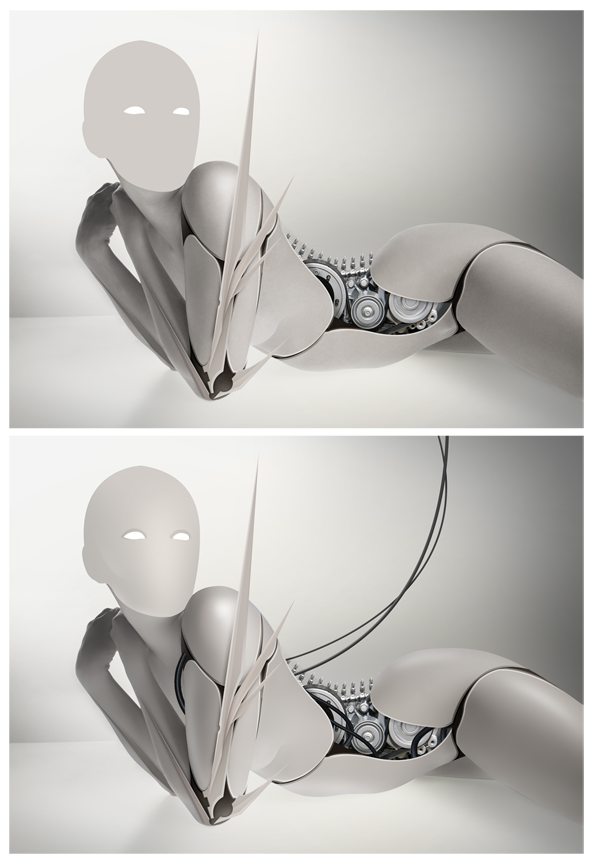
Here you can see the new additions since the last installment.. Since the last step, Ive done a little work on the face (just to give it a little personality!), however it may be revamped somewhat later down the line:
Cyber Gloss
My buddy Fantasio uploaded a great cyberpunk piece that went heavy with the gloss, so I thought I’d take the principles and apply a variation to the droid we’re working on. From his development shots, I could see the highlights were painted manually using a tablet. For our version we’ll be using the Pen Tool and Soft-Edged brushes.
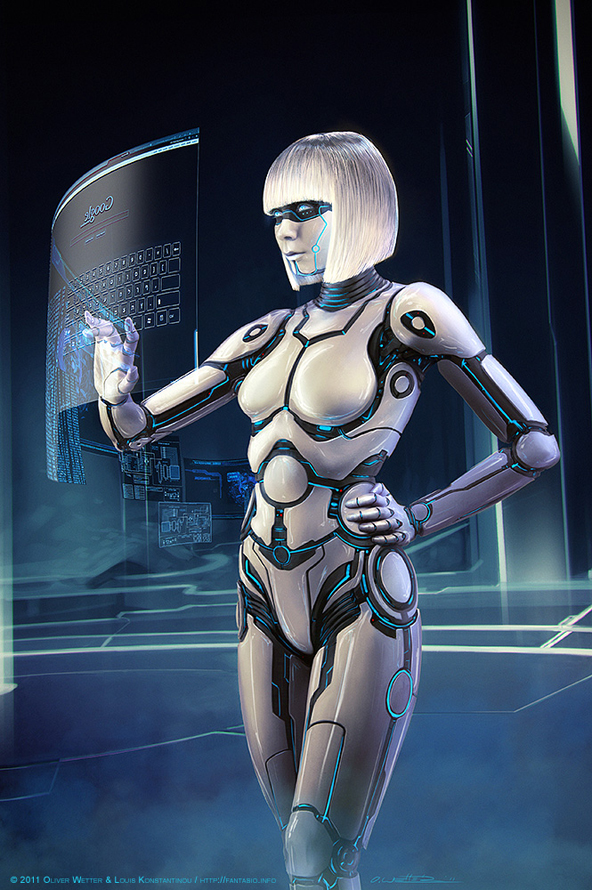
Viewing new art on a daily basis is essential for building your skillset in photo manipulation and raising your visual awareness. As a creative community we are constantly adapting and interpreting the work of our peers. For more on this topic, check out:
Soft Highlights
The highlights in our variant are a little softer, however you may want to try the sharp approach as demonstrated in Android Legacy above. One method used in the example piece, which produced smooth results was achieved using the Pen Tool, Gaussian Blur and the Eraser..
Create a new layer and name it ‘General Highlights’, with the Pen Tool (P) create a shape that follows the contour of the anatomy and fill it with white (right click path, select ‘Fill Path’). Refer back to the source image to see what highlights were evident in the original, it’s always worthwhile mimicking the lighting environment of the source pic for natural results. Delete the path and apply a Gaussian Blur until you have the desired result:
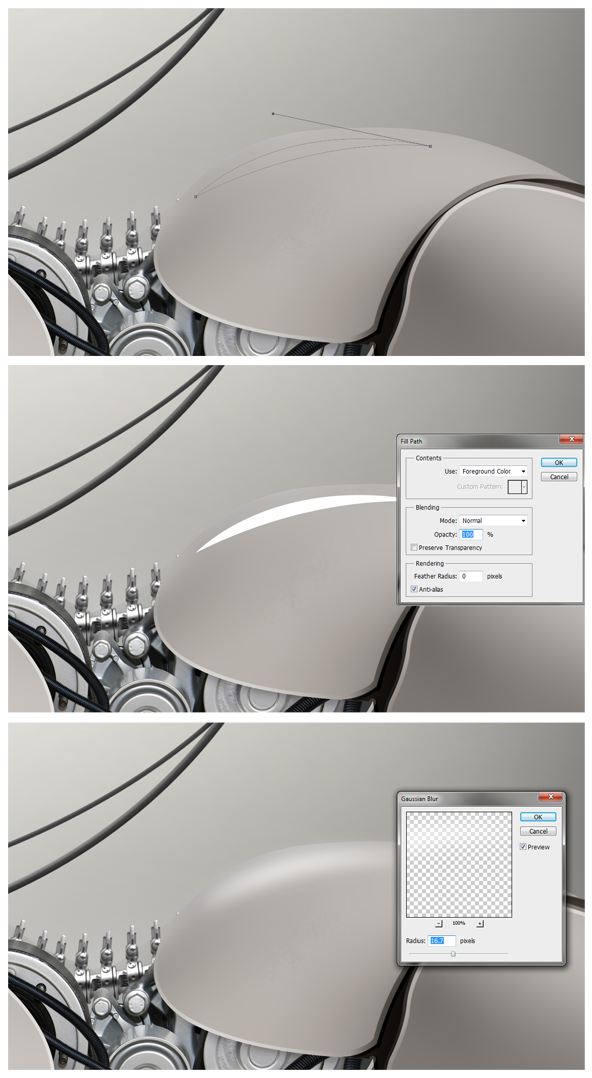
If you have a steady hand, why not try achieving similar results with a large Soft-Edged Brush (B), and then paint away the edges using the Eraser (E) to refine the shape. The Eraser (E), set to a soft-edged setting was used quite a lot at this stage to tidy up and reduce the strength of the highlights where necessary.
Sharper Highlights
Here’s a method similar to the above that allows you to produce highlights with varying sharpness. The method involves creating a path with the Pen Tool (P), turning the path into a selection (right click path, select ‘Make Selection’, Feather Radius: 0px), and then painting in your highlight using a large Soft-Edged Brush (B). You can then tweak using an Eraser and change the Layer Opacity to suite the direction of your piece:

Tubes
Ive used a combination of stock elements and painted resources to put together the wires and tubing in this piece.. I had a file from a previous manip that would work well in this project, so I brought it in. I’d already done the background removal so that saved a hefty amount of time!
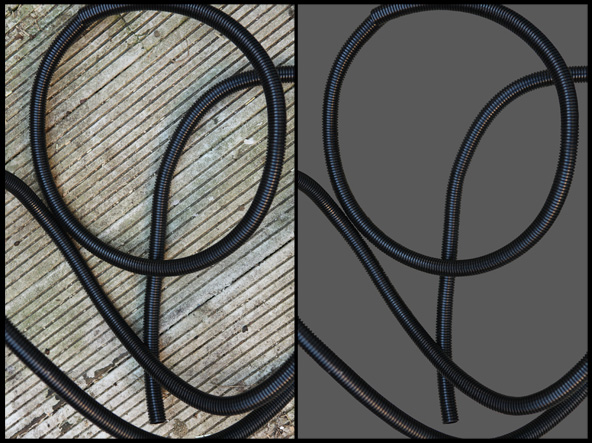 With the hard work already done, I merely brought in the stock element and scaled / rotated to fit (Ctrl/Cmd + T) the various elements of the manipulation:
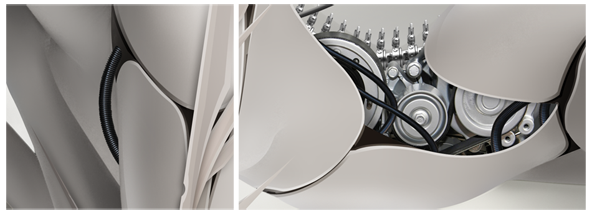
Corrugated / ribbed tubes, plumbing supplies and shower tubes all make great cyberpunk stock.. Have a hunt around online; if you can’t find exactly what your looking for, why not shoot some stock yourself to get the perfect fit. Background removal on these types of items is very time consuming though, so you’ll need to be patient with it ![]()
..You may want to adapt the spine technique we used in the Machine Works tutorial to create custom tubes using stock elements. Here’s a refresher, if you wanted to give it a go:
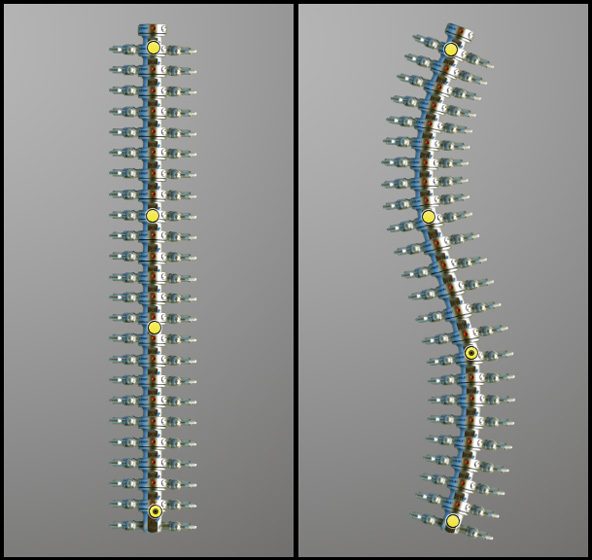
Ive only just recently upgraded to Photoshop CS5 and was really pleased to find that this version is choc full of REALLY useful features. One of my favourites from this new batch of tools is the Puppet Warp function, which enables you to bend stock images to your will, so to speak. I used the Puppet Warp feature to create the spine for my android, heres how I done it:
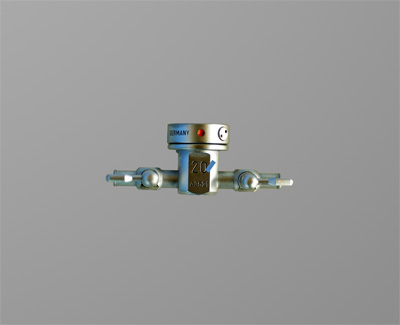
To create a ‘spine’, start with one element that you would like repeated; in my case a small sprocket thing:
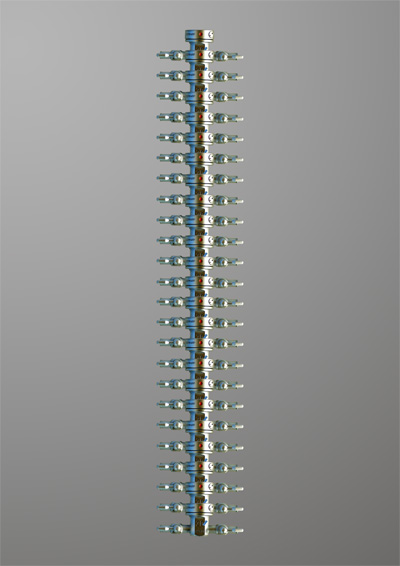
Keep duplicating the layer (Ctrl/Cmd + J to Duplicate) until you have a row:
Merge the seperate layers together so the ‘spine’ is it’s own single layer, in my example I cut one edge off the side to make it more spine-like. Heres where the Puppet Warp tool comes in; with your spine layer active, select the Puppet Warp Tool (Edit > Puppet Warp). Using the pin tool that appears, assign some ‘points’ to the spine, these act as hinges – you can then control the hinges using your mouse and contort the layer to your liking:
This is an extremely powerful function, and Im sure this is just the tip of the iceberg in terms of it’s full capabilities. If you have CS5, have a play – theres tonnes of uses for a tool like this.
Wires
This is an old old method, but I’d really like an updated version.. If anyone has any better technique, please share it with me!! ![]()
The principle behind creating these wires is to create a path with the Pen Tool (P), and then stroke using a Hard-Edged Brush (right click path, select ‘Stroke Path’), set to the thickness you would like the wires to be. In this case, you don’t require the path to be ‘closed’ – it just has to resemble the overall wire shape you require. Once you have done that, you then apply a Layer Style (Bevel and Emboss) to give it shape and depth:
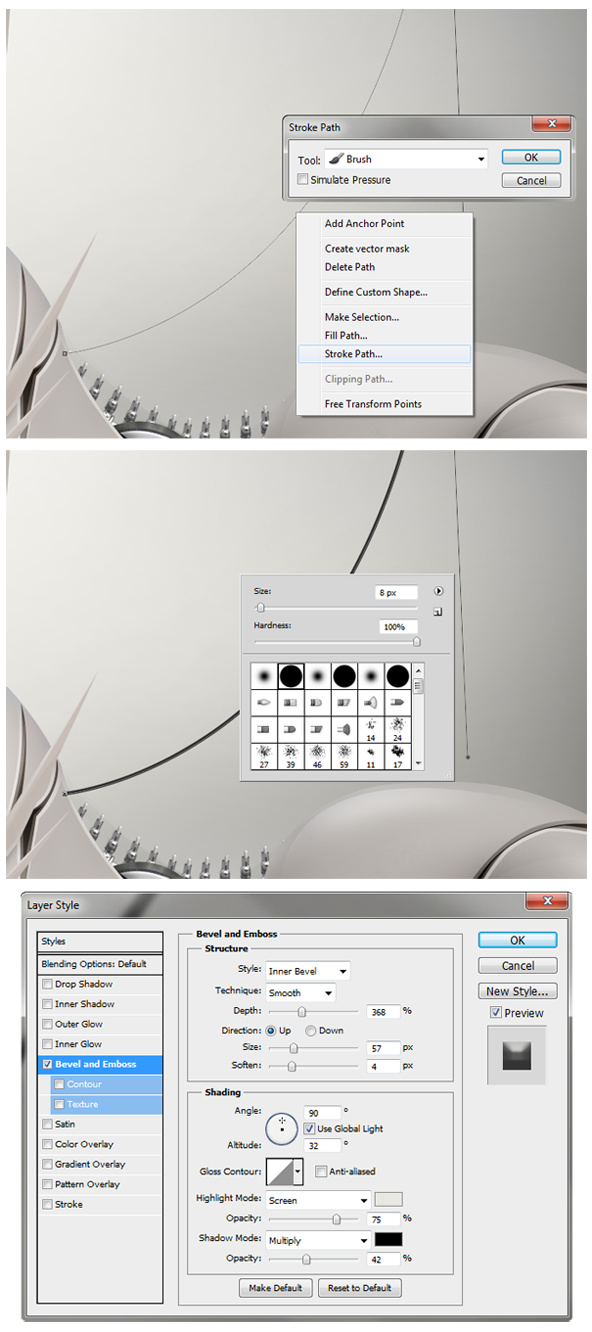
Im really not keen on using Layer Styles like this, as there is a fair amount of creative control lost.. however, Ive yet to find a superior method for giving depth to wires! Remember, never just use the default settings.. You’ll always want to get in there and tweak the depth, softness, opacity and other parameters to style it effectively. Another useful setting is the Highlight and Shadow modes that allow you to tweak the lighting of the Bevel / Emboss to suit your overall piece. Highly recommended.
Our Work So Far:

What’s Next..
What’s next..? I honestly don’t know! If you have any suggestions as to what techniques we could employ to finish this piece, please let me know. As ever, feel free to share alternative methods and tips in the comments section below, and +1 if you enjoyed ![]()
Conzz ![]()
Follow on Twitter >> @Conzpiracy
• Photoshop Android Part 1: Mech Spines
• Photoshop Android Part 2: Machine Works
• Photoshop Android Part 3: Panel Work
• Photoshop Android Part 4: Highlights and Wires
• Photoshop Android Part 5: Mech-A-Face
great tutorial as always, very usable. thanks
Excellent, thanks for tuning in
Hey bro, once again you didn’t disappoint What I would really to find out thought is how you make it look like your model i.e Second Splinter has deep inset lines in her sink, almost like scarification. Its the last think I’m stuck on lol
Elliot, I’ll see what I can do for the last installment. Appreciate your continued support!
Great stuff and very useful as per but I really don’t think you can get away this easy! The face needs some attention. As it is it just doesn’t look right, it’s kind of unfinished … Even a cyberpunk girlie deserves some personality!
I’m impressed with mr. Fantasio’s work, although I reckon it would be even cooler if the subject matter was a bloke for once, but then again, I’m a woman, so …. yeah.
Be bad!
It looks kind of unfinished, as it is unfinished lol.. We have one more step to do, then I think thats a wrap for this series. Patience miss! One day, we’ll have to create a cyber bloke, just to buck the trend lol
Cheers!
the texture trick is really amazing, I’m so not used to work with vectors in photoshop, but now I’ll definitely give it a chance!
I wouldnt call the Pen a vector tool as such, its more of a versatile selection tool that is very precise and clean. One of my favourite tools! Glad you enjoyed
Might I suggest applying a clear plexiglass looking “See Through” mask to overlay the face. I see 2 different choices for the under-face. One would show a beautiful human face under the clear mask, with minimal mechanical features. The other option could show a much more mechanical face. Maybe with the only “Human” aspect being the eyes.
P.S.
I’m really enjoying your tutorials. I’m currently trying to get the “Pen Tool” basics down. I’m using CS4, but I’m sure I can acheive decent results. (Not sure how to work around the lack of “Puppet Warp”), but I’ll figure something out.
Hi Gary, thanks for the comment. Im unsure what direction I’ll take with the face, but those are some great ideas.. I dont know whether to go for purely mechanical or integrate the human element like you suggested.
Understanding the pen tool will be a massive asset to your skillset, the puppet warp is just ‘fluff’ in comparison. The shear tool found via the filters option (Filters > Distort > Shear) does a similar job in CS4.
great ideas
I was doing all the body with surface blur but not considering making a spot highlighted
It was good thank you
ah here is my tutorial for that cyborg I hope you find something new
http://image-labs.blogspot.com/2013/07/photoshop-tutorial-how-to-make-humanoid.html