Subscribe
Tutorial Index
Sci Fi Series: Space Vixen Photoshop Tutorial
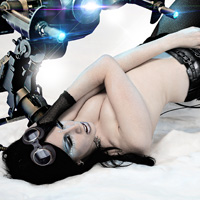 After an epic run with our Horror series, we’re now shifting focus to the wonderful world of Sci Fi. Over the next 4 weeks, we’ll be creating sci fi, cyberpunk and futuristic concepts and creations, using a range of photomanipulation techniques in Photoshop. First on the agenda is a 60′s flavoured Space Vixen composite, inspired by cult favourite Barbarella. So let’s boldly go where no Digital Artist has gone before!!
The Stock
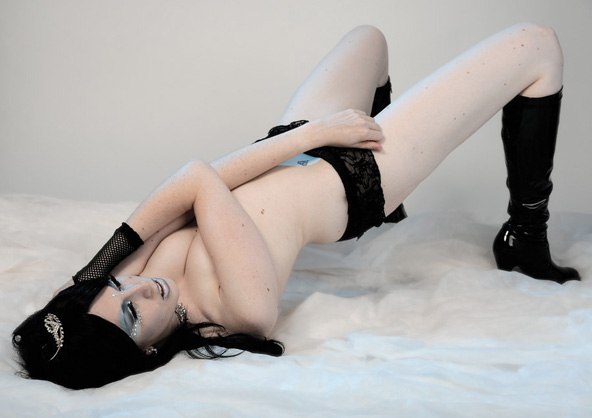
Sometimes a stock image just jumps out from the crowd, with a concept ready to roll.. As soon as I saw this stock, it instantly reminded me of the campy sci fi Barbarella (1968) – a perfect fit for our new Sci Fi series! Ice Queen by Aurora-Dawn (DeviantArt):
Concept
For this concept we’ll undertake a basic retouch and create funky sci fi accessories for the navigatrix, rebooting the ideas from the 1960s with a modern twist.
Retouch
To begin, undertake a cleanup on whatever stock image you are using. As we’re creating an idealised future vixen – remove all blemishes or moles with the Spot Healing BrushTool (J). Ensure your brush size is just a little bit bigger than any blemish you remove, you can quickly control brush-size using the square bracket keys [ ].
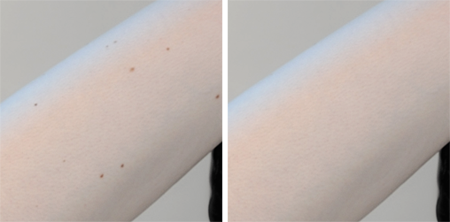
To remove bigger elements, different tools are required. Patch Tool (J) and the Clone Stamp Tool (S) often come in handy for this kind of repair work.
To use the Patch Tool (J), draw a selection around the area you would like to repair – click in the middle of the selection, and drag to a ‘clean area’. The Patch Tool will repair based on the pixels in the clean area.
To use the Clone Stamp Tool (S), hold down Alt and click on a clean area that you would like to sample. Release Alt and then paint over the repair area, using the square brackets as necessary to change the brush size [ ]. This one takes a little learning, but is not too difficult once figured out.
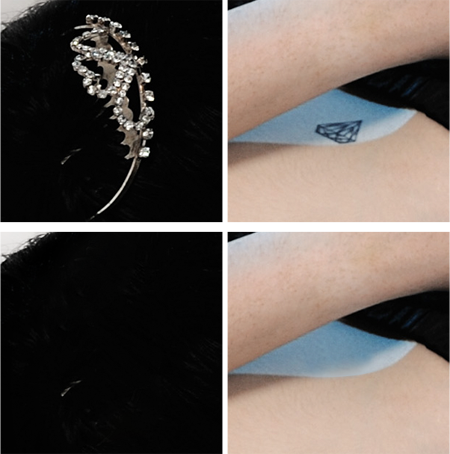
Two elements removed using the Patch Tool and Clone Stamp Tool.
Seperating Model from Background
Once happy with the cleanup on your primary stock image – it’s time for some compositing! The best method for creating a precise selection around the body is to use the Pen Tool (P). Create a selection around the body using the Pen Tool (P) (set to paths). Once the path is complete, right-click on the path and choose ‘Make Selection’ from the dialog. Hit Ctrl/Cmd + J to make a copy of your stock model on a new layer above.
As versatile as it is, the Pen Tool doesn’t always work too well with hair. You may want to check out the Masking / Selecting Hair video tutorial for a great rundown on working with hair in Photoshop CS5 and above. As my model has jet black hair, I actually used a cheat method! This basically involves using Multiply layer mode for a seperate hair layer. Sounds complex? Not really.. check out the Brunette Background Removal tutorial for more info ![]()
Facial Vibrancy
For the example piece, I wanted to boost the colours and vibrancy of the lips and eyeshadow colour. The first step is to duplicate your stock model layer (Ctrl/Cmd + J), and change the layer mode to Soft Light. Add a Layer Mask to your duplicated Soft Light layer (add layer mask icon, bottom of layers palette), and invert the mask to black (Ctrl/Cmd + I). Using a Soft-Edged Brush (B) set to white, paint over the details you would like to enhance. This step increases the richness of the tones naturally (pic 2 below).

To enhance the colours even further, add a new layer and set the mode to Overlay. Select the Soft-Edged Brush (B), and sample colours you would like to enhance by holding the Alt key (temporarily switched brush to Eyedropper Tool). Paint on the new Overlay layer to increase the saturation of the tones using your sampled colours (pic 3 above).
Build up as many Overlay Layers as required to get the desired hues. The example piece used two layers set to Overlay.
Teeth Whiten
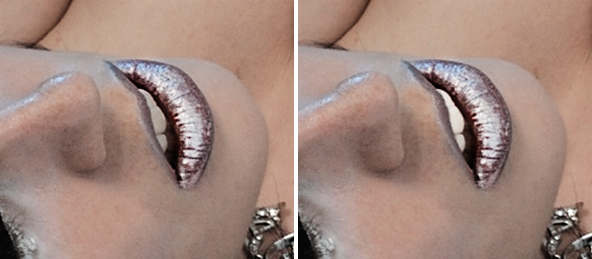
Whitening is nice and straightforward; duplicate your stock model layer (Ctrl/Cmd + J) and add a Layer Mask. Set this new layer to Screen. Invert the Layer Mask to black (Ctrl/Cmd + I), and then use a small Soft-Edged Brush (B) set to white to paint in the brightness:
Porcelain Skin
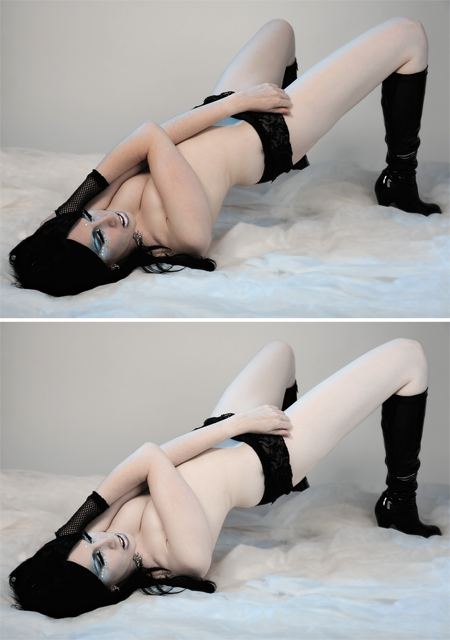
We’ll use a similar technique to enhance the brightness of the skin for a flawless porcelain effect. Duplicate your stock model layer, and Desaturate (Shift, Ctrl/Cmd + U). Set the duplicate to Screen Layer mode and reduce the opacity until it looks natural. The example piece uses opacity of 50% for the porcelain skin layer.
You’ll need to remove the effect anywhere it’s not necessary like the hair, clothes and eyes etc. Add a Layer Mask and remove these areas using a Soft-Edged Brush (B) set to black.
Background Boost
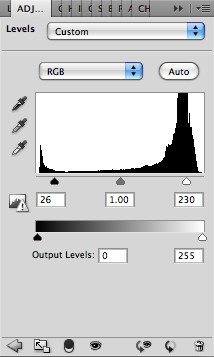
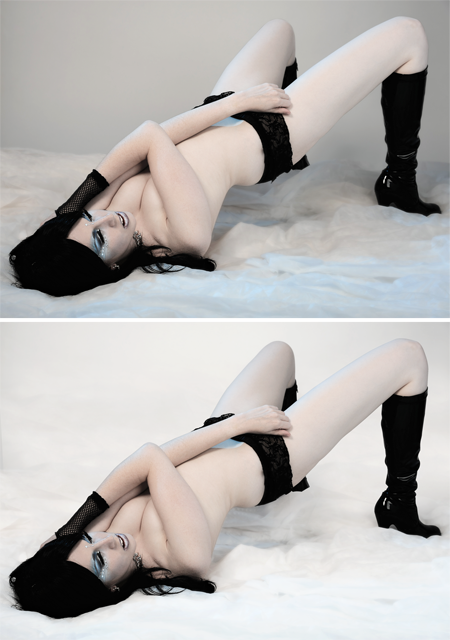
To really bring out that high-contrast look in the example, the whites were given a healthy boost. The background layer was duplicated (Ctrl/Cmd + J), and set to Screen – and then a Levels Adjustment Layer applied to enhance even further.
A subtle change, but worth it for this look:
Space Leggings
At this stage you’ll definitely want to start using Layer Groups to organise your Layers (Ctrl/Cmd + G).
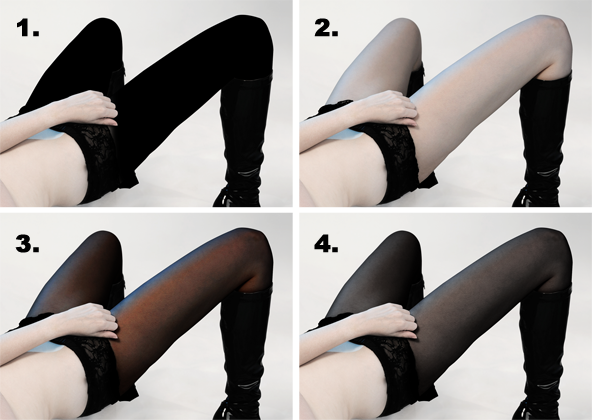
Pic 1. In a new Layer Group, create a new Layer (Ctrl/Cmd, Shift + N). Trace around the body area you would like to create the space-clothing using the Pen Tool (P), in the example the exposed leg areas were chosen. Fill your path with black (right-click on path, select ‘fill’ in the dialog, Black for the fill type).
Pic 2. Change the layer mode to Soft-Light.
Pic 3. Duplicate this Layer a couple of times until you get the desired effect (Ctrl/Cmd + J).
Pic 4. Ctrl/Cmd + Click the Leggings layer icon to create a selection. Add a new Layer at the top of the stack (Ctrl/Cmd, Shift + N), and fill your selection with Black. Change the layer mode to ‘Color’. This desaturates the colour for a more nylon looking effect.
Spiderman Texture
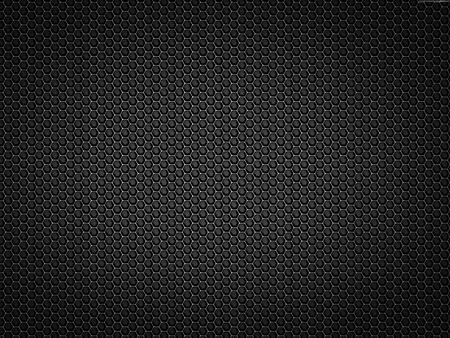
To make these leggings a little more futuristic, we’ll add a space-age texture. The look achieved with a honeycomb mesh overlay is quite similar to the new spiderman design. Choose a texture for an overlay, the example uses Honeycomb Metal Mesh from psdgraphics.com.
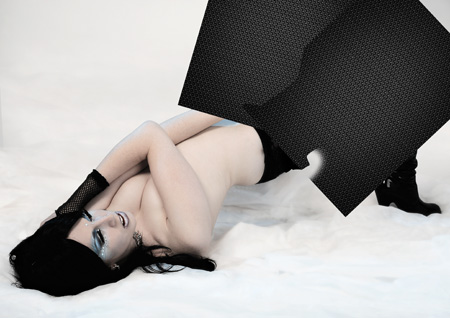
Position the texture on a new layer above your leggings using the Move Tool (V) and the Transform Controls (Ctrl/Cmd+T). Here’s how the texture was arranged in the example piece:
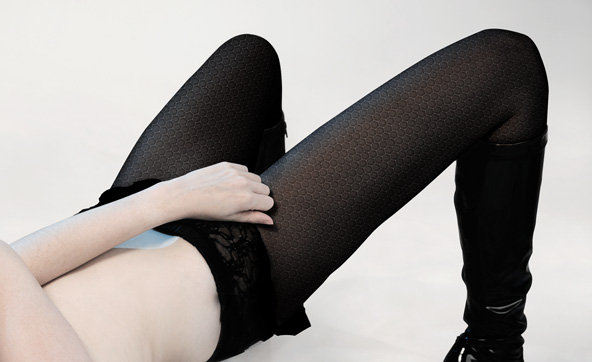
Change the mesh texture layer to Soft Light layer mode. We want the effect to be applied to the leggings only, so add a layer mask to the mesh layer and invert to black (Ctrl/Cmd + I). Create a selection based on the original leggings layer (Ctrl/Cmd + click layer icon), and fill with white on the mesh layer mask (you can use Paint Bucket, or right click on selection and choose ‘Fill with White’).
You may want to tweak the Layer Opacity to get the desired effect, the example uses 60% opacity for the mesh layer:
Goggles
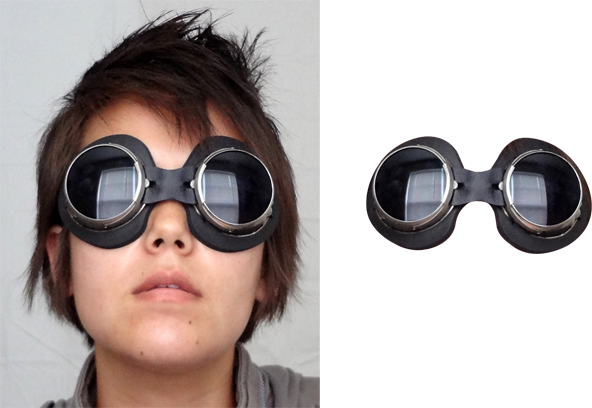
Some kitschy goggles complements the look nicely. I got a good looking pair from M3-Productions (DeviantArt); use the Pen Tool as before to create a selection (right-click path, make selection) around your goggles and then copy to a new layer (Ctrl/Cmd + J):
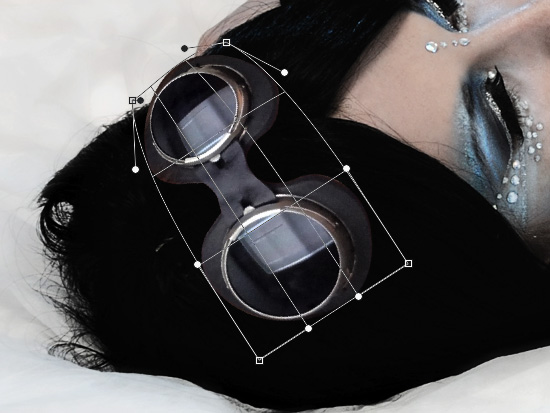
Use the Transform Tools (Ctrl/Cmd + T) to scale and rotate your prop into position. You can use the Warp Tool (Edit > Transform > Warp) to achieve a sense of perspective / depth with flat objects:
Mean Bootz
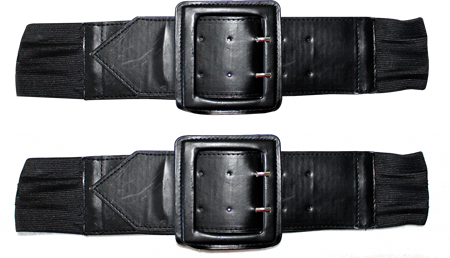
To add more off a tactical flavour to the boots, try adding some buckles. I got a little selection from Paul-Norontaus (DeviantArt) that fit the bill nicely. Again, all selections were done with the Pen Tool for real clinical precision:
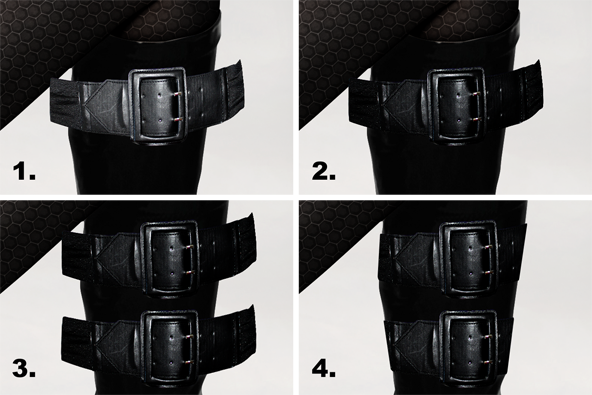
Pic 1. Position and tweak your buckle using Transform Tool (Ctrl/Cmd + T) and Warp Tool (Edit > Transform > Warp).
Pic 2. You can boost the dark tones of anything by duplicating a layer (Ctrl/Cmd _ J) and changing it to Multiply. Adjust opacity of the duplicate until it looks right and then merge down (Ctrl/Cmd + E).
Pic 3. Duplicate as many buckles as you need (Ctrl/Cmd + J).
Pic. 4. Remove any excess not required. In the example piece a Layer Mask was used.
Belt
Use the same process as above to add any additional accessories. A very small shadow was manually added under the belt and hand to add a touch of realism – using Levels with Layer Mask:
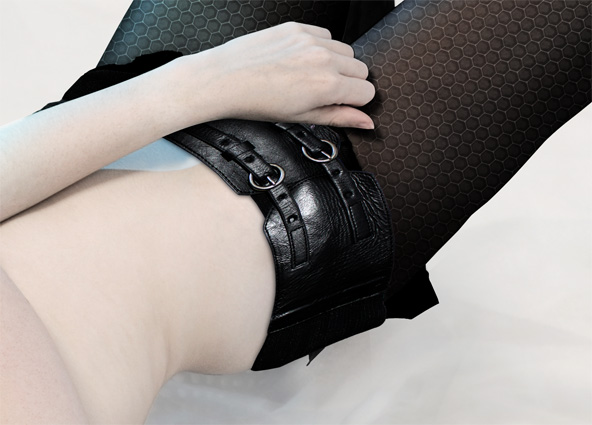
Patches??
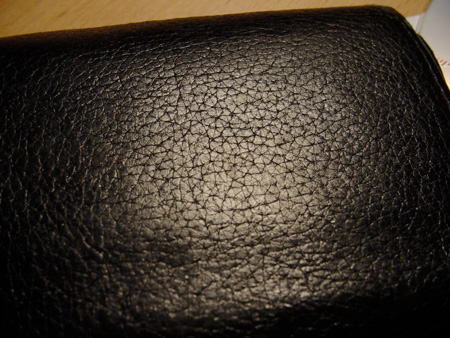
You can always add little flourishes like important looking patches that probably serve some kind of purpose.. For this step, another texture was used; this time a leather wallet by -bladex- (DeviantArt):
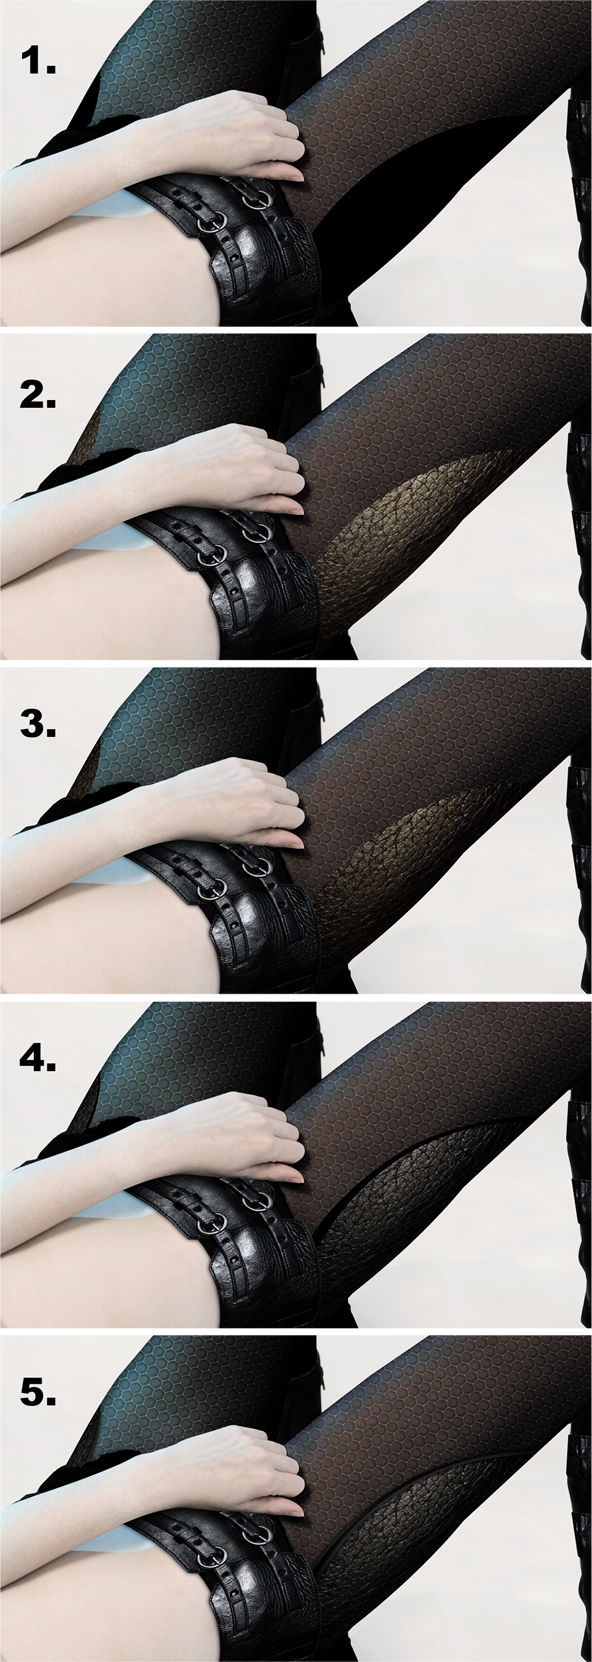
Here’s how the patches were made..
Pic 1. Shapes were created with the Pen Tool (P) and filled with Black (Right-click path, Fill with Black).
Pic 2. The wallet texture is copied (Select All – Ctrl/Cmd + A. Copy – Ctrl/Cmd + C) A selection was created based on the shape layer (Ctrl/Cmd + click Layer icon), then the wallet is pasted into the selection (Edit > Paste Special > Paste Into).
Pic 3. Like the buckles, the texture layer is duplicated and changed to Multiply layer mode to darken, and then merged down (Ctrl/Cmd + E).
Pic 4. Additional shapes are drawn with the Pen Tool to create some ‘edging’ and filled with black.
Pic 5. Subtle details added to the edging. The highlights were created by drawing along the edges with a grey colour using a Soft-Edged Brush (B) – whilst there is a selection active on the shape layer (Ctrl/Cmd + click layer icon).
To create manual shadows quickly, duplicate a layer – use Levels (Image > Adjustment > Levels) to reduce the layer contents to pure black, and apply a subtle Gaussian Blur (Filter > Blur > Gaussian Blur). Ensure this layer is below the object casting the shadow, and remove any unwanted shadow using Eraser Tool (E).
Scene-It
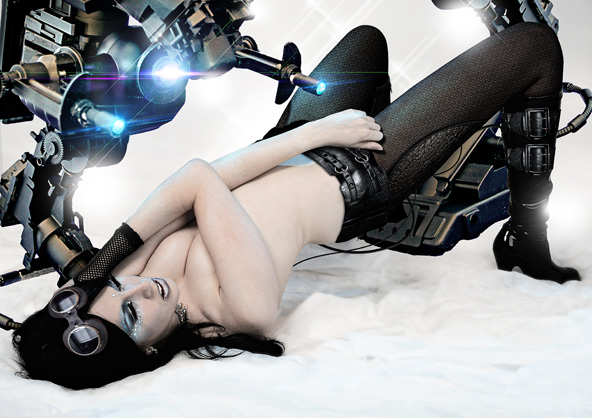
Once happy with your Space Vixen, be sure to dress her up with suitable scenery. Here’s the finished article for the example piece. Stocks: Sci Fi Prop by Inadesign-Stock (DeviantArt), Optical Flares by PSDBox, Sparklies by redheadstock (DeviantArt).
Review
Three more Photomanipulation Sci Fi epics coming your way over the next few weeks folks – be sure to like our Facebook page to stay abreast of updates and happenings here at SurrealPSD. Must rest now, this one was a killer! ^-^
Conzz ![]()
Follow on Twitter >> @Conzpiracy
Man, you add so many tiny details with stock (creating the belt and buckles) I have a tough time with that sort of thing Looks great though, the stockings look awesome.
The devil is in the details! Cheers mate
excellent tut, Conz. this suggests that there are endless ways to apply techniques we know to achieve creative results limited only by our imagination. well done, brah!
Much appreciated Mak, glad you enjoyed